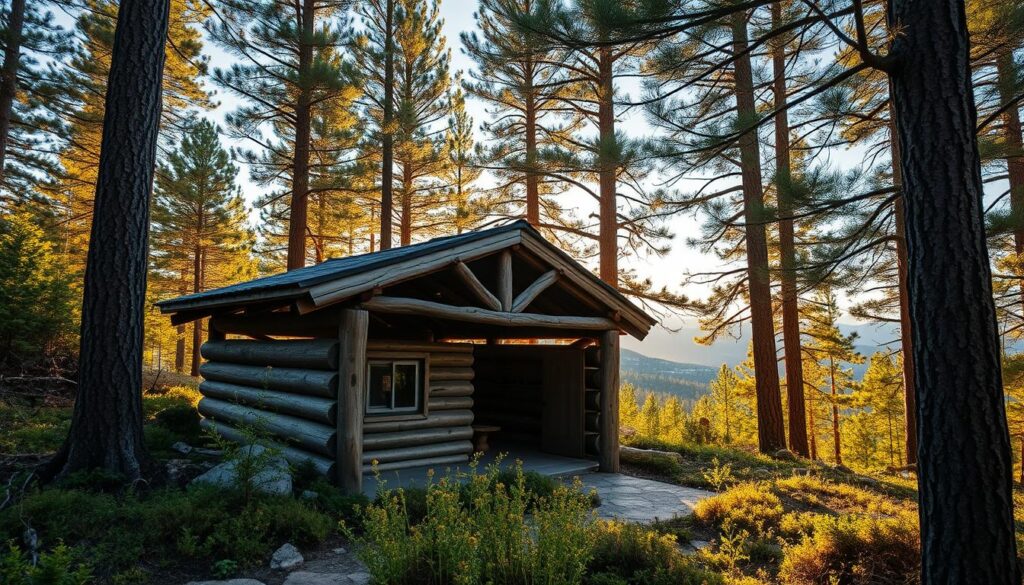
When you head into the wilderness, learning to build a shelter is key. It keeps you safe from bad weather and boosts your mood. It gives you a sense of safety and comfort, even when things are tough.
As survival guides like Taking Shelter show, picking the right spot is important. It should be dry, flat, and shielded from wind and floods. For more tips on making a good survival shelter, check out My Guide to Crafting a Reliable Survival Shelter.
Building a shelter is more than just finding quick protection. It’s about making a safe place that can be a lifeline when you’re in a survival situation.
Key Takeaways
Choose a dry and relatively flat location for your shelter.
Protect your shelter from wind and possible flood paths.
Use natural materials like branches and leaves to build your shelter.
Think about the size of your shelter to keep warm.
Learn about different shelter types, like lean-to, A-frame, and debris hut.
Understanding the Importance of a Wilderness Shelter
A wilderness shelter is more than a structure; it’s a lifeline. It keeps me safe from harsh elements. When I’m in the wilderness, a good shelter can mean the difference between life and death.
Shelters protect me from many dangers. Rain, snow, wind, cold, and sun exposure are just a few. They help prevent hypothermia and other illnesses caused by the weather.
Why a Shelter is Essential for Survival
A shelter is not just a physical barrier. It also offers psychological comfort. Having a safe place to rest boosts my morale and reduces stress. These are key in survival situations.
Shelters also serve as bases for survival activities. They help me start fires, store food, and signal for help if needed.
Key Features of an Effective Shelter
An effective shelter has key features. It must be wind- and waterproof. It should also have a sturdy structure that can handle different weather. Insulation is important to keep warm inside.
Here are some key characteristics of an effective wilderness shelter:
Feature
Description
Importance Level
Waterproofing
Prevents water from entering the shelter
High
Windproofing
Protects against wind chill and debris
High
Insulation
Maintains internal temperature
Medium
Structural Integrity
Ensures the shelter remains standing
High
Understanding the importance of a wilderness shelter helps me prepare for survival. Knowing what makes a good shelter is key.
Choosing the Right Location for My Shelter
Before I start building my shelter, I need to pick the best spot. I look at the terrain to see where my shelter will be safest and most useful. This is key for a good outdoor shelter.
Evaluating Terrain and Weather Conditions
The land and weather are very important for my shelter’s location. I check for dangers like flood zones, steep slopes, and landslides. These can be risky.
Weather matters too. I avoid places with strong winds or too much rain. Wind direction, sunlight, and rain patterns are all important.
Finding Natural Resources Nearby
Being close to natural resources is also important. I look for trees for building, rocks for the base, and water for drinking. Having these nearby makes my shelter better.
Resource
Importance
Usage
Trees
High
Timber for framework
Rocks
Medium
Building foundation, anchoring
Water Sources
High
Hydration, hygiene
By looking at the terrain, weather, and natural resources, I can find the best spot. This makes my wilderness shelter design work better.
Selecting the Materials for Construction
To build a good wilderness shelter, I must pick the right materials and tools. The materials I choose affect the shelter’s strength, how well it works, and its overall quality.
I can pick from natural or man-made resources. Natural materials like branches, leaves, and pine needles are easy to find. They help the shelter blend in. Man-made materials like tarps, paracord, and stakes add strength and keep out the weather.
Natural vs. Man-Made Materials
Mixing natural and man-made materials is a smart way to build a shelter. For example, I can use branches and logs for the frame. A tarp can be the waterproof roof. Paracord helps tie everything together, making it stable.
Natural materials are easy to find and blend well with the environment. But, they might not last as long or keep out the weather as well. Man-made materials are stronger and protect better but are harder to carry and set up.
Tools I Need for Construction
Choosing the right tools is just as important as picking materials. A knife is key for cutting, and stakes are needed to anchor the shelter.
Other tools like a saw or axe for big logs, a hammer or rock for stakes, and rope or paracord for tying everything together are also important. With the right tools and materials, my shelter will be strong, safe, and ready for any weather.
Different Types of Wilderness Shelters
The wilderness has many shelter options, each with its own benefits and ways to build. Knowing the different types of wilderness shelters is key to making a good choice.
My experience shows that the right shelter can greatly improve survival chances. We’ll look at lean-to, A-frame, and debris shelters.
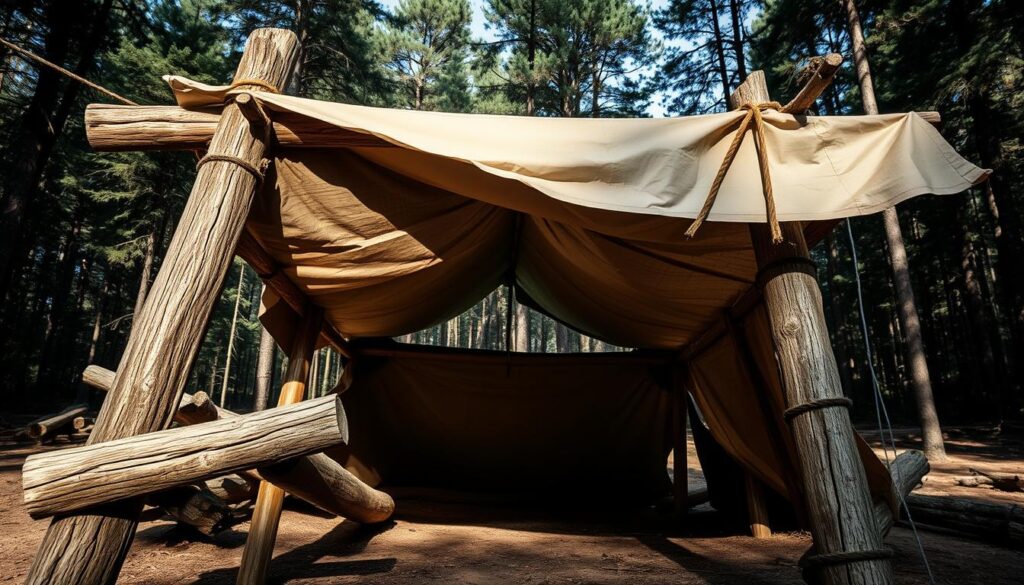
Lean-To Shelters
A lean-to shelter is simple to make. You prop a ridgepole against a tree or rock and cover it with branches or a tarp. It’s fast to build and needs little material.
A-Frame Shelters
An A-frame shelter is a favorite for many. It’s made by creating a triangle with two sloping sides. This design keeps out wind and rain well.
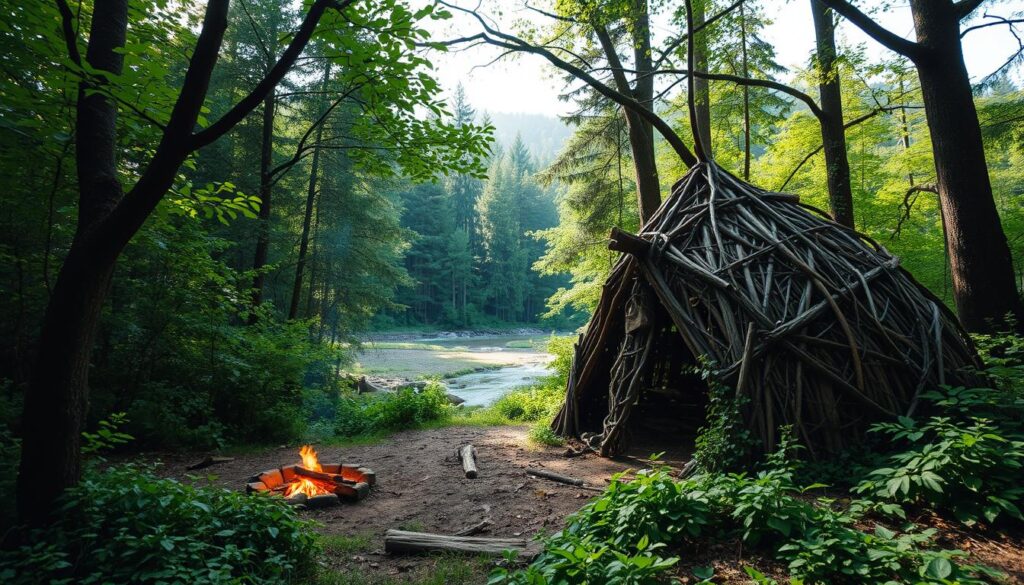
Debris Shelters
A debris shelter uses natural materials like leaves and branches. It blends into the environment, making it great for survival and bushcraft.
Shelter Type
Construction Complexity
Protection Level
Lean-To
Simple
Moderate
A-Frame
Moderate
High
Debris
Complex
High
Each outdoor shelter has its own strengths. Knowing these can help pick the best shelter for any situation.
In conclusion, choosing a wilderness shelter depends on many things. These include the environment, materials, and needed protection. By knowing the different shelters, people can prepare better for wilderness survival.
Step-by-Step Construction of a Lean-To Shelter
When you’re in the wilderness, knowing how to build a lean-to shelter is key. It’s simple and keeps you safe from the weather. It’s a basic survival skill that’s easy to learn.
Preparing the Site
Start by picking a flat area that’s away from wind and rain. Look for a spot with natural protection, like trees or rocks. Make sure the area is clear of debris and leaves.
Key considerations when preparing the site include:
Level ground to ensure the shelter’s stability
Proximity to a water source, but not so close as to be in a flood zone
Avoiding low-lying areas that could collect water
Building the Framework
Next, find branches or poles for the shelter’s frame. They should be strong, straight, and long enough to cover you.
The framework construction process involves:
Placing two sturdy poles parallel to each other on the ground
Leaning additional poles against these main beams to create the lean-to structure
Securing the poles in place using rope, twine, or natural fibers like vines
Adding Insulation
After the frame is up, add insulation to keep warm and dry. Use leaves, grasses, or pine needles to cover the structure. Aim for a thick layer to block cold and wind.
Tips for effective insulation:
Use dry materials to avoid dampness inside the shelter
Create a thick layer to enhance insulation properties
Regularly inspect and maintain the insulation to ensure it remains effective
By following these steps, you can build a lean-to shelter. It will protect and comfort you in the wilderness, helping you survive.
Tips for Enhancing Shelter Durability
I can make my wilderness shelter last longer by using weatherproofing and reinforcement. A strong shelter keeps me safe from the weather and is a safe place in emergencies. To do this, I focus on keeping it dry and strong with natural materials.
Weatherproofing Techniques
To make my emergency shelter last, I use weatherproofing methods. I use natural or easy-to-find materials to keep water out and reduce wind damage.
I also use tarps or plastic bags to make it waterproof. It’s key to tie these down well to fight off wind and rain.
Reinforcing Structure with Natural Elements
Adding natural elements to my outdoor shelter is key. I use branches, logs, or rocks to make it stronger and more stable.
For example, rocks or logs around the base keep it from moving in strong winds. Also, tying it with flexible branches makes it more durable.
Technique
Materials Needed
Effectiveness
Weatherproofing
Leaves, grasses, tarps
High
Reinforcement
Branches, logs, rocks
High
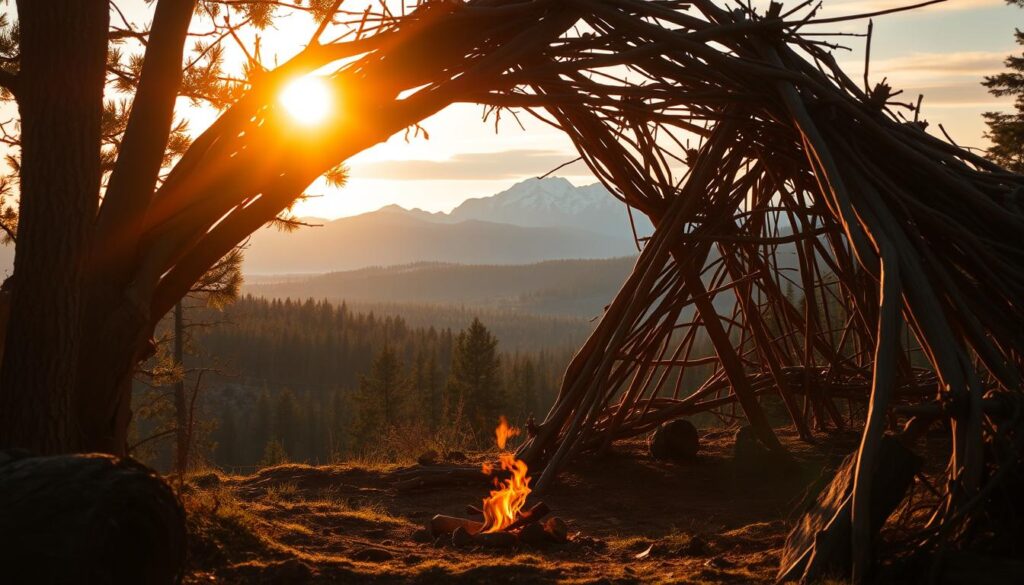
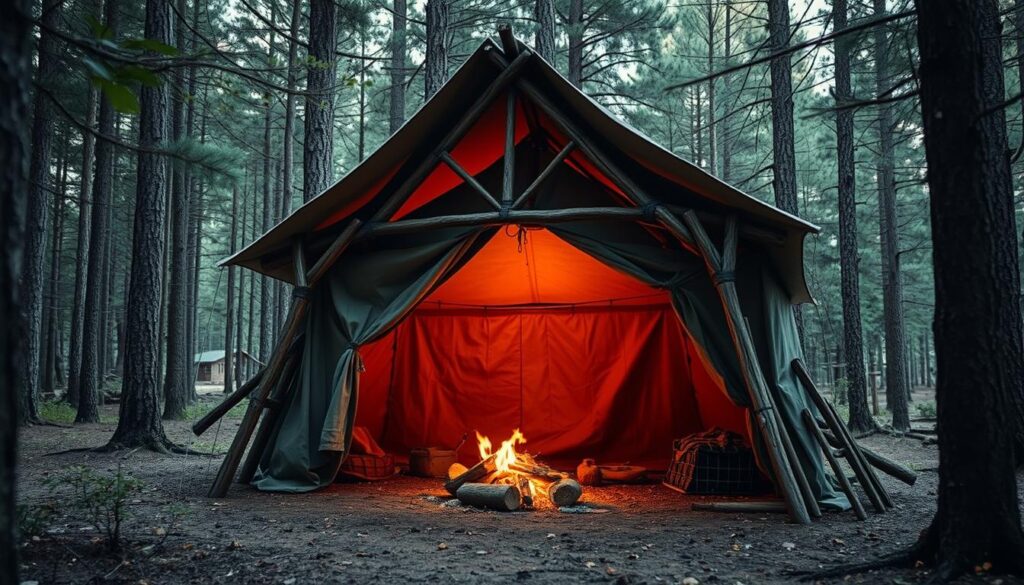
Seeing these techniques can help me understand better. Here’s an example of a reinforced shelter:
By mixing weatherproofing with reinforcement, I make my wilderness shelter last longer. This keeps me safe and gives me peace of mind when I’m outdoors.
Safety Considerations When Building
Building a wilderness shelter requires careful attention to safety. It’s essential for protecting me from the elements and dangers. A well-built shelter is key to my safety.
Avoiding Hazardous Areas
I must choose a safe location for my shelter. Hazardous areas to avoid include:
Low-lying areas prone to flooding
Places with loose rocks or falling debris
Areas with standing water that could attract pests or be breeding grounds for insects
Locations near wildlife habitats or trails
By avoiding these areas, I can lower the risk of accidents. This ensures a safer shelter for me.
Ensuring Stability of the Shelter
Stability is key for a durable and safe shelter. To ensure this, I should:
Choose a relatively flat area for the shelter to prevent water accumulation around it.
Use sturdy materials for the framework that can withstand wind and rain.
Anchor the shelter properly to the ground to prevent it from being displaced by wind or water.
Regularly inspect the shelter for any signs of damage or wear.
By following these steps, my shelter will stay stable and secure. It will be a safe place for me in the wilderness.
Personalizing My Wilderness Shelter
Personalizing my bushcraft shelter is more than just making it look good. It’s about making a space that feels like home in the wild. Adding personal touches makes a big difference in my survival experience.
One key part of personalizing my shelter is adding comfort features. I make a bed of leaves or pine needles for insulation and coziness. I also use grasses or soft mosses for a more comfortable sleeping area.
Adding Comfort Features
To make my shelter more comfortable, I focus on a few things. First, I make sure the floor is dry and free from dampness. I use dry leaves or a waterproof tarp for this. I also create a seating area with logs or rocks for resting and enjoying the view.
Adding a small fire pit is another comfort feature I consider. It’s built to keep the fire contained while providing warmth and a way to cook. This adds to the shelter’s ambiance, making it feel more welcoming.
Using Natural Decor
I also add natural decor to my shelter to make it more inviting. I use items like pinecones, shells, or interesting branches. For example, arranging pinecones or leaves on the floor adds warmth and personality.
Using natural materials, I create simple furnishings or decorations. A woven basket from flexible branches and grasses can be both a storage container and a decorative piece. It enhances the shelter’s feel.
By adding comfort features and natural decor, my wilderness shelter becomes more than just a place to stay. It feels like a home in the wild. This personal touch makes my survival experience more enjoyable and fulfilling.
Maintenance and Upkeep of My Shelter
Keeping my wilderness shelter in good shape is key. It must protect me from bad weather. A well-kept shelter also gives me peace of mind when I’m in a tough spot.
Thinking about shelter upkeep, I realize regular checks for damage are essential. I look for cracks, leaks, or weak spots. This way, I can fix problems before they get worse.
Regular Checks for Damage
Inspecting the shelter regularly is important. I check the framework, the roof, and make sure it’s dry and pest-free. This helps me catch problems early.
Inspect the framework for any signs of damage or weakening.
Check the roofing material for leaks or damage.
Ensure the shelter remains dry and pest-free.
As Ray Mears, a renowned survival expert, once said,
“A shelter is only as good as its maintenance; neglect it, and it will fail when you need it most.”
This shows how important it is to keep up with maintenance.
Seasonal Adjustments
Making seasonal adjustments is also key. Different times of the year bring different challenges. My shelter needs to be ready for snow in winter and rain in spring.
Before winter, I make sure my shelter can handle snow. I reinforce it and check the roof. In the wet season, I look for leaks and make sure water drains well.
By doing regular checks and making seasonal changes, my shelter stays safe and reliable. It’s a place I can count on, no matter the weather.
Conclusion: My Experience in Crafting a Wilderness Shelter
Building a wilderness shelter taught me a lot about survival skills. It’s not just about having a place to sleep. It’s about knowing the environment and using what nature offers.
Key Takeaways
A good bushcraft shelter can save your life in the wild. I learned to look at the terrain, weather, and resources around me.
Final Reflections
Learning to build a wilderness shelter is a key survival skill. It helps you stay safe and thrive in the outdoors. By using what I learned, you can increase your chances of survival.
FAQ
What is the most important factor to consider when choosing a location for my wilderness shelter?
The most important factor is to evaluate the terrain and weather conditions. Make sure the site is safe and protected from harsh weather.
What type of materials can I use to build a wilderness shelter?
You can use natural materials like branches, leaves, and pine needles. Or, you can use man-made materials like tarps and rope.
How do I make my wilderness shelter more durable?
To make it more durable, use weatherproofing techniques. Apply a waterproof coating and reinforce with rocks and logs.
What are some common safety hazards to avoid when building a wilderness shelter?
Avoid building in floodplains and steep slopes. Make sure your shelter is stable by anchoring it securely.
Can I personalize my wilderness shelter to make it more comfortable?
Yes, you can add comfort features like bedding and insulation. You can also use natural decor like leaves and branches.
How often should I inspect and maintain my wilderness shelter?
Regular checks for damage and seasonal adjustments are key. This ensures your shelter remains safe and functional.
What is a lean-to shelter, and how do I build one?
A lean-to shelter is a simple structure. It involves building a framework of branches and covering it with materials. Start by preparing the site, then construct the framework, and add insulation.
What are the benefits of building a debris shelter?
A debris shelter provides excellent insulation and protection. It can be built using natural materials readily available in the wilderness.
Can I use a tarp to build a wilderness shelter?
Yes, a tarp is useful for building a shelter. It provides a waterproof layer and protects against wind and rain.
How can I ensure my wilderness shelter is stable and secure?
Anchor your shelter securely with rocks and logs. Regularly check it for damage or signs of weakness.