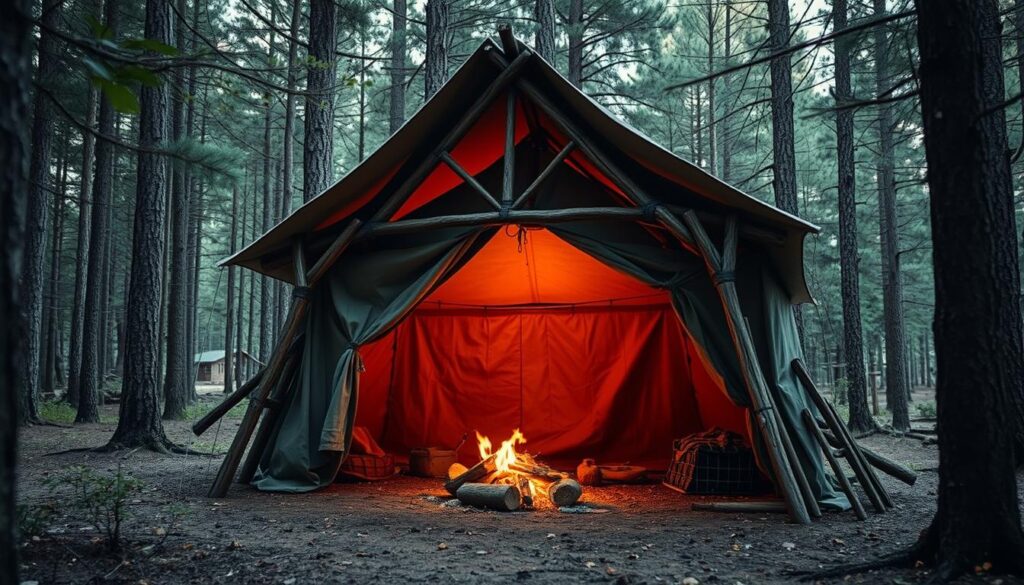
I remember the day I started building a survival shelter in the wilderness. It was a mix of excitement and fear. As I dug and built, I saw how important a safe place is when things get tough.
Building an emergency shelter needs careful planning and doing. Choosing the right spot and hiding the shelter are key steps. Each one is important for staying safe.
My experience showed me that anyone can make a safe place to hide. In this article, I’ll tell you how to build a reliable dugout.
Key Takeaways
- Selecting the right location is key for a survival shelter.
- Camouflaging the shelter is vital to stay hidden.
- Planning and doing well are essential for a safe hideout.
- A good shelter can save your life in emergencies.
- Creating a survival shelter takes patience and determination.
Understanding the Concept of a Dugout Shelter
Learning about dugout shelters is key for those wanting to build abunkerorunderground shelter. A dugout shelter, also known as asubterranean refuge, offers a safe place. It protects people from dangers like natural disasters and conflicts.
A dugout shelter is basically a hole in the ground with a roof. It can be made from different materials. Its simple design hides its strong ability to protect against threats.
Dugout shelters have been around for a long time. They were used by many cultures and civilizations. These shelters were for hiding, military use, and even homes.
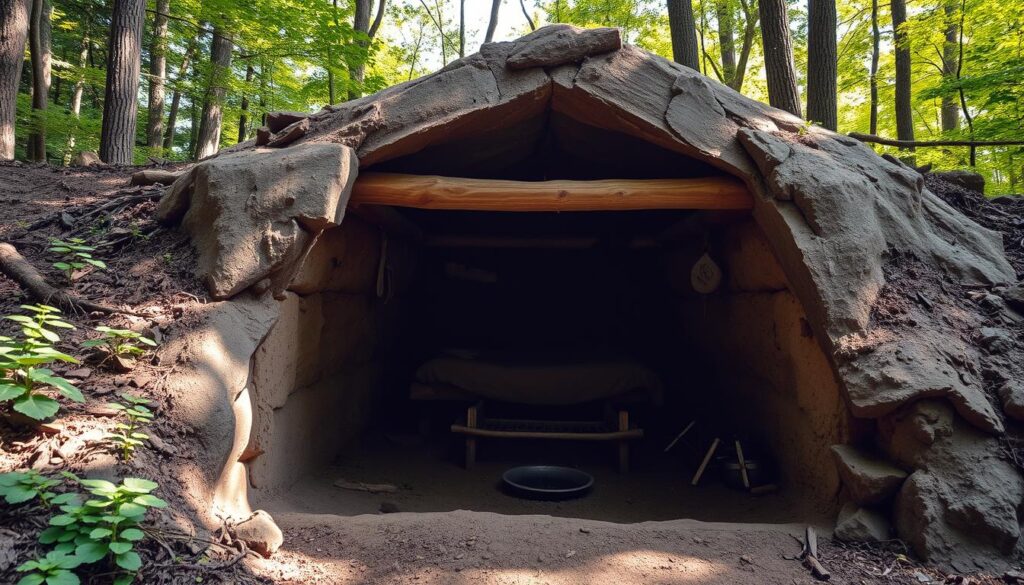
What is a Dugout Shelter?
A dugout shelter is a type ofunderground shelter built into the ground. It has a hidden entrance. It’s made to stand up to outside forces like soil and weather, keeping the inside safe.
Building a dugout shelter needs careful planning. You must pick the right spot, check the terrain, and choose the right materials. The goal is to make a strong, safe place for protection.
Historical Significance of Dugout Shelters
Throughout history,dugout shelters have been important for safety. They’ve been used by military, civilians, and as temporary homes. This shows their value in times of crisis.
The importance of dugout shelters comes from their ability to offer a safe place in hard times. Their design and use have changed over time. This reflects new technology and changing needs.
Understanding dugout shelters shows their role in many situations. They prove human creativity in facing challenges.
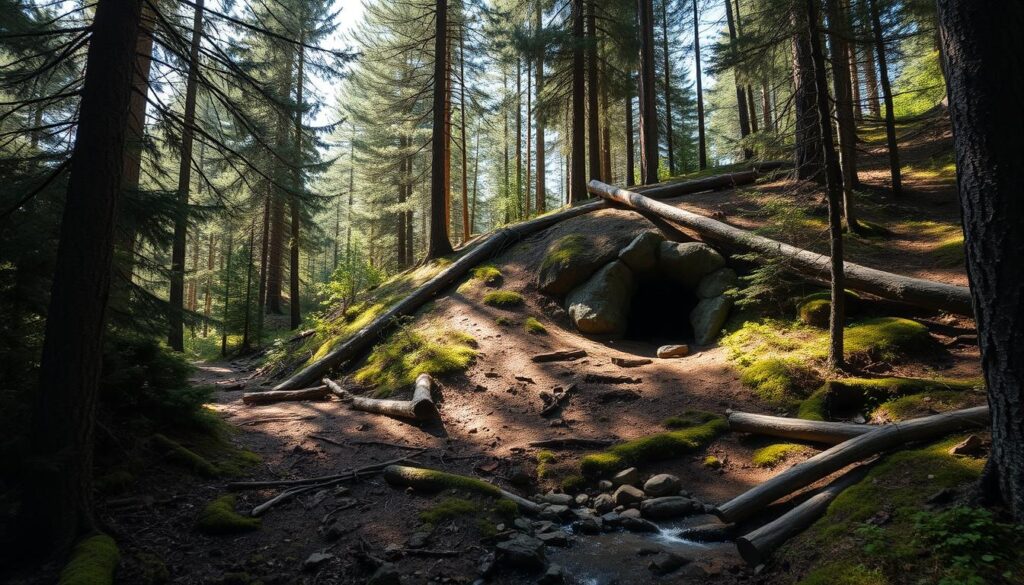
Choosing the Right Location
Finding the right spot is key for a safe and useful off-grid shelter. When picking a place for your dugout shelter, think about a few important things. These will help make your shelter last and work well.
Assessing Terrain and Environment
The land’s shape and surroundings are very important for your sustainable housing project. Look at the land’s slope, soil, and natural features.
Make sure water won’t collect near your shelter. A gentle slope is good, but stay away from areas that might slide or erode.
Evaluating Safety and Accessibility
When picking a spot for your disaster preparedness shelter, safety and easy access are top priorities. Check if the area is safe from natural disasters and close to what you need.
- Look at the risk of flooding, earthquakes, or other dangers.
- Check how close it is to water, food, and other important things.
- Make sure you can get to it, even when the weather is bad.
By looking at these points, you can find a spot that meets your needs now and in the future for your off-grid shelter.
Tools and Materials Needed
To build a strong emergency shelter, you need the right tools and materials. The right tools make building faster and the shelter safer and more durable.
It’s important to know that the tools and materials needed can change based on the shelter’s design and where it’s built. But, there are some things that everyone needs.
Essential Tools for Construction
Building a dugout shelter requires the right tools. Some key tools include:
- A sturdy shovel for digging
- A pickaxe for breaking through tough soil or rock
- A trowel or small shovel for detailed excavation and smoothing out surfaces
- A measuring tape and level to ensure accuracy and precision
- A hammer and nails or a suitable alternative for constructing the framework
These tools are key for getting the site ready and building the shelter. It’s also good to have a backup for important tools, in case they break or get lost.
Recommended Materials for Durability
The materials you use for a survival shelter are very important. They affect how long the shelter lasts and how well it works. Some good materials are:
- Waterproofing materials like plastic sheets or waterproof membranes
- Insulation materials like foam or straw to keep the inside temperature stable
- Wood or metal for the framework, depending on what’s available and the shelter’s design
- Soil, sandbags, or other materials for reinforcing the structure and blending it with the surroundings
Choosing durable materials makes the shelter better at handling the weather and keeps it safe and comfortable.
In short, having the right tools and materials is key for a strong and safe dugout shelter. By picking and using the right things, you can build a shelter that will keep you safe in tough times.
Planning the Design of My Dugout Shelter
Before starting, I knew planning my dugout shelter’s design was key. A good underground shelter or bunker is a safe place in emergencies. So, planning was very important.
I began by drawing a detailed blueprint of my underground home. This step is important. It helps me see the space and make changes before we start building.
Sketching a Blueprint
Creating a blueprint is more than just drawing. It’s about thinking about how it will work and if it’s possible. I looked at guides on building an underground bunker to make sure my design was safe and useful.
Space and Layout Considerations
When planning the layout, I thought about space for supplies, living areas, and escape routes. A subterranean refuge needs to be efficient. It must keep people safe for a long time.
I considered where to put ventilation, storage for food and water, and hygiene areas. By planning these, I made a space that is both functional and livable.
Excavation Process
The success of a dugout shelter depends on the excavation process. This phase is key. It sets the stage for a safe and strong survival shelter.
Digging the Shelter: Step-by-Step
To start, I took a step-by-step approach. This made the process efficient and safe. First, I marked the area for the shelter. I considered the space needed for an emergency shelter that could fit the intended occupants.
The steps to dig the shelter were:
- Clearing the land of debris and plants.
- Marking the shelter’s perimeter.
- Starting to dig with a shovel, removing soil to set aside later.
- Deepening the hole while keeping the walls stable.
Managing Soil and Debris
Managing soil and debris is key in excavation. It’s important to remove the soil to keep it from washing or blowing back into the shelter.
Here’s how to manage soil and debris well:
| Task | Description |
|---|---|
| Soil Removal | Remove excavated soil to a safe distance to prevent re-deposition. |
| Debris Disposal | Dispose of any debris and rocks away from the shelter site. |
| Site Cleanup | Ensure the site is clean and free of obstructions. |
By following these steps, I efficiently managed soil and debris. This ensured a clean and safe area for building my dugout shelter.
Constructing the Framework
Now that the digging is done, it’s time to build the framework. This is a key part of my sustainable housing project. It’s important for a disaster preparedness shelter to be strong against different environmental challenges.
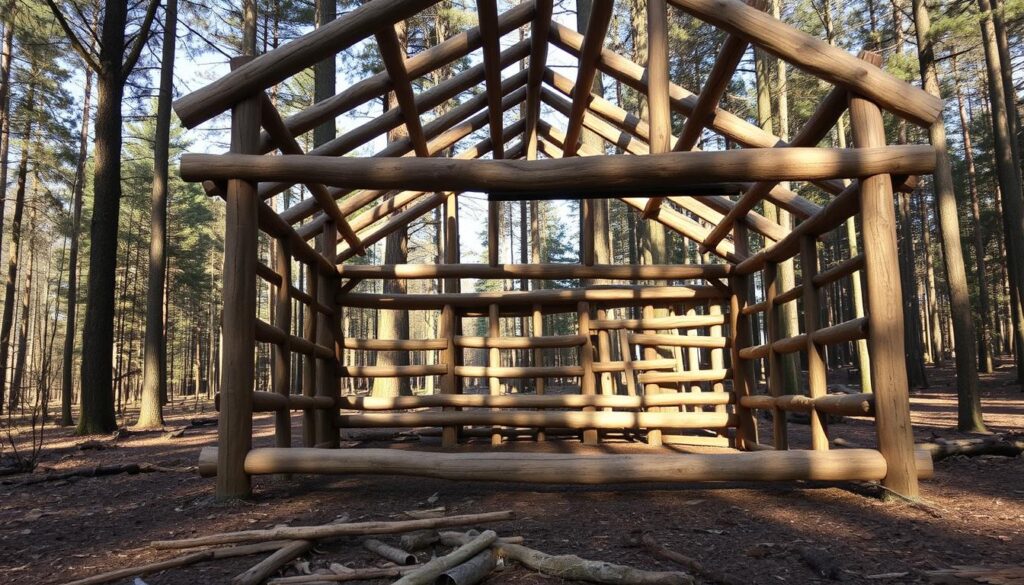
Building the framework involves several important steps. First, we need to make strong walls. A strong framework is key for the shelter’s safety and durability.
Building Strong Walls
To make strong walls, we use materials that last long and fit well underground. I chose reinforced concrete for its strength and long life.
We start by making formwork for the walls, adding reinforcement, and then pouring concrete. It’s important to make sure the formwork is strong and straight to avoid problems later.
Ensuring Structural Integrity
Keeping the shelter’s structure strong is very important. This means building strong walls and making sure the whole thing can handle outside and inside pressures.
As
“The integrity of the structure is only as strong as its weakest link,”
we follow this rule in building. We check and test often to find and fix any weak spots.
- Regularly check the framework for any signs of stress or damage.
- Use top-quality materials that are right for underground building.
- Make sure the design is well-thought-out and considers the local soil and weather.
By focusing on a strong framework, my off-grid shelter will be safe and reliable. This step is key to creating a sustainable home that meets my needs.
Weatherproofing the Dugout Shelter
Keeping my dugout shelter weatherproof was essential. It had to stand up to different weather conditions and stay safe. Insulation and waterproofing were key to keeping the inside of my underground shelter stable.
Insulation helps control the temperature inside. Without it, the temperature could swing wildly. This could make the shelter uncomfortable and even dangerous. I chose foam board insulation because it’s good for subterranean refuges and keeps moisture out.
Insulation Techniques
To insulate my bunker well, I took a careful approach. First, I made sure all surfaces were clean and dry. This helped the insulation stick right and avoided moisture problems.
- Cut the insulation to fit the shelter’s walls, floor, and ceiling.
- Put adhesive on the back of the insulation boards to secure them.
- Seal all joints with tape to prevent gaps.
This way, I made a well-insulated space. It would protect me from extreme temperatures.
Creating a Waterproof Barrier
It’s also vital to keep water out of my subterranean refuge. Water can damage the shelter and make it unsafe.
I put a waterproof membrane on the outside of the shelter. This membrane can handle the soil pressure and stop water from getting in.
- Clean the outside surfaces well for a strong bond with the membrane.
- Apply the membrane as the maker says, making sure it covers everything.
- Check the membrane for any holes or weak spots and fix them right away.
By doing these steps, I made a strong waterproof barrier. This kept my bunker dry and safe.
In summary, making my dugout shelter weatherproof was key. I used insulation and waterproofing to make it safe and cozy. These steps help keep me safe from the weather and make the shelter a reliable place to be.
Ventilation Strategies
Effective ventilation is key in making a dugout shelter livable. Good airflow keeps the shelter healthy.
Importance of Airflow
Airflow is vital for removing stale air and moisture. This reduces mold and mildew risks. A well-ventilated dugout shelter also keeps carbon dioxide levels low, making it safer for people inside.
In survival situations, good airflow can make a big difference. It turns a shelter from bad air quality to a safe place to stay.
Designing Ventilation Openings
Creating effective ventilation openings is essential. You need to balance intake and exhaust vents for smooth air flow.
The table below outlines key considerations for designing ventilation openings:
| Vent Type | Purpose | Location |
|---|---|---|
| Intake Vent | Allows fresh air to enter | Lower section of the shelter |
| Exhaust Vent | Removes stale air and moisture | Higher section of the shelter |
By planning vent placement and size, you can ensure fresh air flows well into the shelter.
Good ventilation does more than just remove stale air. It also adapts to changing environmental conditions.
Adding Safety Features
Adding safety features to my dugout shelter was a top priority. Living underground comes with risks, so keeping people safe is key. This means planning and executing several important steps.
Escape Routes and Access Points
Having multiple escape routes and secure access points is critical. They help people get out fast in emergencies. They also make sure the shelter is easy to get to, no matter the weather.
As a guide on crafting an emergency shelter points out, having more than one exit is vital. It can save lives if one exit is blocked.
When designing escape routes, think about the terrain and any obstacles. A secondary exit might need to be longer or more complex. It’s important to plan carefully so it’s usable.
Fire Safety Measures
Fire safety is also essential. Preventing fires and having a plan for emergencies are key. Use fire-resistant materials, install smoke detectors, and have fire extinguishers ready.
Looking at how other structures prioritize safety can be helpful. For example, the Minnesota Twins’ Target Field added safety netting. This shows the importance of anticipating and preventing hazards.
Here’s a quick summary of important safety features for your off-grid shelter:
| Safety Feature | Description | Importance Level |
|---|---|---|
| Multiple Escape Routes | Ensures quick evacuation in emergencies | High |
| Fire-Resistant Materials | Reduces risk of fire spreading | High |
| Smoke Detectors | Early detection of fires | High |
| Fire Extinguishers | Immediate response to fires | High |
By adding these safety features, you can make your off-grid shelter safer and more livable. This ensures a secure place for everyone.
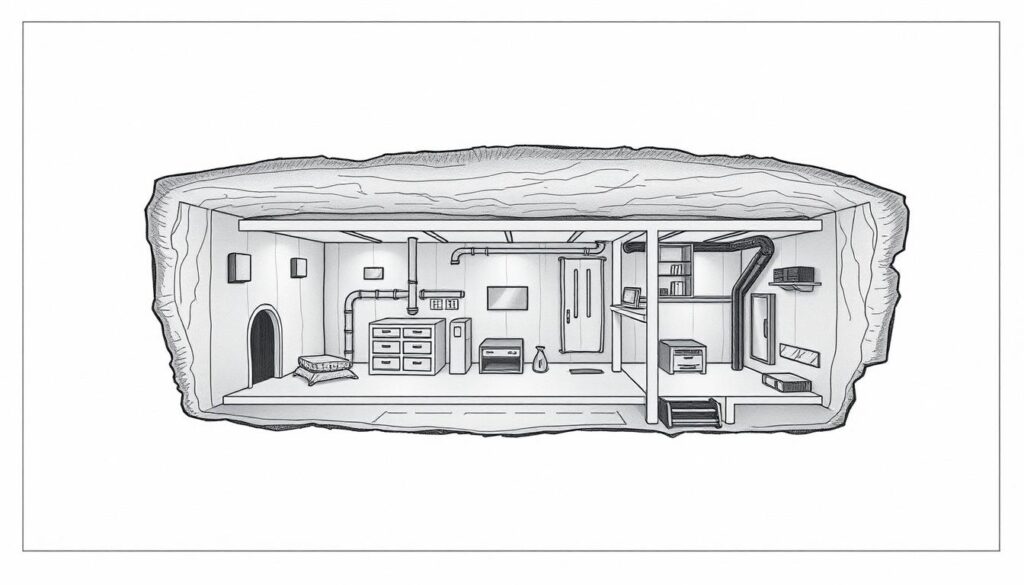
Enhancing Comfort and Livability
Turning my dugout shelter into a cozy space needed careful planning. I focused on furnishing it and finding good light and heating solutions.
Furnishing the Shelter
Furnishing my underground shelter was more than looks; it was about making it functional. I started with shelving units from durable materials like metal or treated wood. These were key for storing supplies and personal items.
Creating a comfy sleeping area was also important. I chose bunk beds that save space and offer good rest. The bunk beds were made from strong materials to handle the subterranean environment.
| Furniture | Material | Purpose |
|---|---|---|
| Shelving Units | Metal or Treated Wood | Storage |
| Bunk Beds | Sturdy Wood or Metal | Sleeping Quarters |
| Table and Chairs | Compact, Durable Design | Dining and Work Area |
Light and Heating Solutions
Lighting in my bunker was made to be efficient and reliable. I chose LED lighting, which saves energy and doesn’t get too hot. It also has backup power for when the lights go out.
For warmth, I picked a small, efficient heating unit made for underground shelters. It keeps the place cozy without using too much energy.
By focusing on these areas, I made my underground shelter a safe and cozy place. It’s now ready for long stays.
Testing My Dugout Shelter
Testing my dugout shelter was key to finding its weak spots and making fixes. This was vital to make sure my emergency shelter could face various survival challenges.
I tested it under different conditions to see how it held up. This way, I could check if it was a solid survival shelter.
Simulating Survival Scenarios
I first tested it against extreme weather like heavy rain and strong winds. This showed me how it stood up to nature’s forces.
I also tested it with different numbers of people and for different lengths of time. I looked at how well it kept people comfortable and safe inside.
Identifying Weak Points
While testing, I found a few areas that needed work, like small leaks and better insulation. Fixing these was important to boost the shelter’s performance.
By fixing these issues, I made my emergency shelter much safer and more durable. It’s now ready for survival situations.
Learning from testing my dugout shelter has been incredibly helpful. It gave me a deep understanding of what works and what doesn’t in survival situations.
Reflecting on the Experience
Building a dugout shelter has taught me a lot about being self-sufficient and resilient. It’s not just a shelter for disasters; it’s a step towards living sustainably.
I learned the value of careful planning and doing things right. From picking the best spot to making sure it’s well-ventilated, every detail matters. These lessons are great for anyone starting to build their own shelter.
Practical Takeaways
For beginners, start by really understanding the land and environment. Make sure your shelter is strong and safe. By doing this, you can build a shelter that’s ready for disasters and helps the planet.
Looking back, building a dugout shelter is more than just a project. It’s about living a life that values being strong and caring for the earth.
FAQ
What is a dugout shelter?
A dugout shelter is an underground or partially underground structure. It’s designed to protect from elements and hazards.
Why is choosing the right location important for building a dugout shelter?
The right location ensures the shelter is safe and accessible. It also protects from natural hazards and threats.
What are the essential tools needed to build a dugout shelter?
You’ll need shovels, pickaxes, and excavation equipment. Also, materials for the framework and weatherproofing.
How do I plan the design of my dugout shelter?
Start with a blueprint. Think about space and layout. Make sure it meets your needs and protects you.
What is the importance of weatherproofing a dugout shelter?
Weatherproofing keeps the shelter safe from water, wind, and extreme temperatures. It ensures a healthy environment.
How do I ensure proper ventilation in my dugout shelter?
Design ventilation openings for airflow. This removes stale air and brings in fresh air. It keeps the environment healthy.
What safety features should I include in my dugout shelter?
Include escape routes, access points, and fire safety measures. These ensure occupant safety in emergencies.
How can I enhance the comfort and livability of my dugout shelter?
Furnish the shelter and provide light and heating. Add amenities to make it habitable.
Why is testing my dugout shelter important?
Testing ensures the shelter works in survival situations. It helps find weak points and improve it.
What are some common mistakes to avoid when building a dugout shelter?
Avoid poor location, inadequate planning, and neglecting weatherproofing and safety features.
Can a dugout shelter be used as a long-term sustainable housing solution?
Yes, a well-designed dugout shelter can be a sustainable housing option. It’s safe and eco-friendly.
How does a dugout shelter relate to disaster preparedness?
A dugout shelter can be a safe place during disasters. It protects from earthquakes, hurricanes, and floods.
What is the difference between a dugout shelter and an underground bunker?
A dugout shelter is simpler, while an underground bunker is more complex. Bunkers are designed for long-term stay.