Thinking back on my outdoor adventures, I see how important a DIY shelter is. It keeps me safe and makes my time outdoors better.
A lean-to is a great choice for many reasons. It works well in different seasons and places. Its ease and usefulness make it a key skill for anyone who loves the outdoors.
In this guide, I’ll show you how to build a lean-to shelter. I’ll share the steps and tips you need to make one successfully.
Key Takeaways
Understanding the basics of a lean-to structure
Learning the materials needed for construction
Gaining step-by-step instructions for building
Discovering tips for making it last longer
Exploring various uses of the lean-to shelter
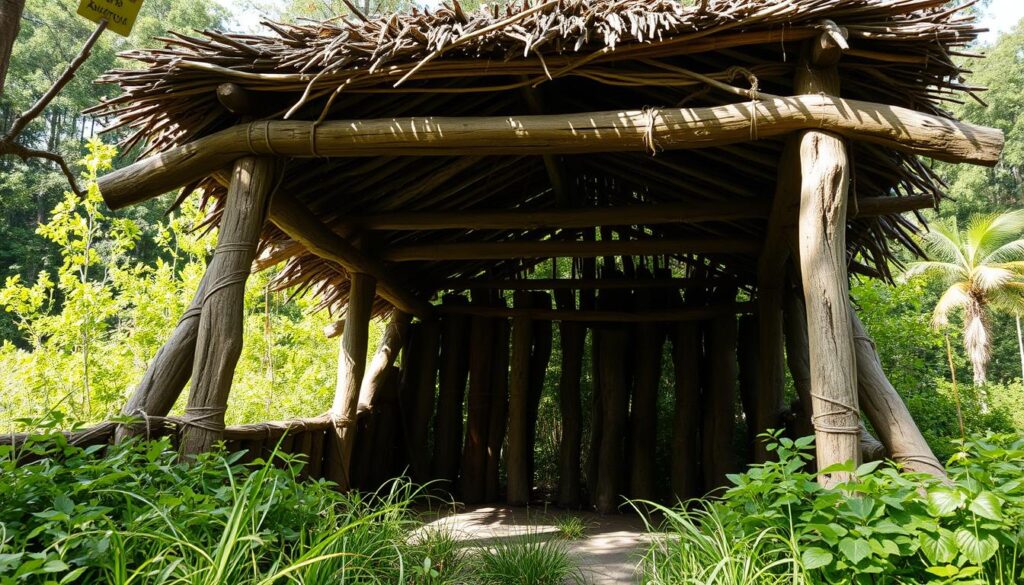
Understanding the Lean-to Shelter Concept
A lean-to shelter leans against a framework to protect from the elements. It’s called a lean-to because it looks like materials leaned against a structure.
What is a Lean-to Shelter?
A lean-to shelter has a sloped roof and a simple framework. It’s great for quick housing outdoors, like on camping trips or in survival situations. Its design is easy to follow, even for those new to building.
Key Benefits of Building a Lean-to
Building a lean-to shelter has many advantages, including:
Quick to Construct: Lean-to shelters can be built fast, often in hours, with the right materials.
Minimal Materials: They need just a few materials, which can often be found nearby.
Effective Protection: Lean-to shelters offer good protection from wind, rain, and sun.
Outdoor fans say, “A lean-to shelter is a versatile and practical solution for temporary shelter needs.”
“A lean-to is not just a shelter; it’s a haven in the wilderness that can make a significant difference in survival situations.”
Ideal Situations for Using a Lean-to
Lean-to shelters are perfect for many situations, including:
Situation
Description
Camping Trips
Provides a simple and quick shelter solution for campers.
Survival Situations
Offers protection from the elements in emergency situations.
Outdoor Events
Can be used as a temporary shelter for outdoor events or festivals.
In conclusion, knowing about lean-to shelters is key for wilderness adventures. They are simple, effective, and versatile, making them a great choice for temporary shelters.
Essential Materials for Building a Lean-to
Building a lean-to shelter needs careful picking of natural materials. The right materials help make a strong and safe shelter. This is key for outdoor survival and wilderness living.
Types of Natural Materials
Choosing the right materials for a lean-to is important. You’ll need strong sticks, leaves, pine needles, and forest debris. These items are easy to find in woods and help build a solid shelter.
Strong branches: These are the main structure, giving your lean-to its shape.
Leaves and pine needles: They help keep you warm and make the roof waterproof.
Rope or vines: These tie the structure together, keeping it stable.
Material
Use
Characteristics
Strong branches
Frame
Durable, sturdy
Leaves/pine needles
Insulation/roofing
Water-resistant, abundant
Rope/vines
Binding
Flexible, strong
Recommended Tools for Construction
While natural materials are the main part of your lean-to, the right tools make building easier. You’ll need:
A knife or sharp stone for cutting branches and vines.
Rope or cordage for tying the structure together.
A mallet or heavy stone for driving stakes into the ground.
With the right materials and tools, you can build a lean-to that’s safe and comfortable. This improves your outdoor survival experience.
Selecting the Right Location
Finding the right spot for your lean-to shelter is key to its success. Knowing the right wilderness skills helps a lot. It makes picking a good site easier.
First, you need to know what makes a good site. Look for a flat area that fits your shelter well. Stay away from places that might flood or collect water.
Criteria for Choosing a Good Site
Flat terrain to ensure a stable foundation
Proximity to a water source, but not so close as to be at risk of flooding
Avoid areas with standing water or where water tends to collect
Natural protection from harsh weather conditions, such as windbreaks
For more tips on picking a survival shelter spot, check out this article. It offers great advice on finding the best emergency shelter location.
Environmental Considerations
Think about the environment when choosing your spot. Place the lean-to’s opening to face away from the wind. Also, watch out for falling branches, rocks, or places where animals live.
By carefully looking at these factors and using your wilderness skills, you can build a safe and useful emergency shelter. This will make your wilderness adventure better.
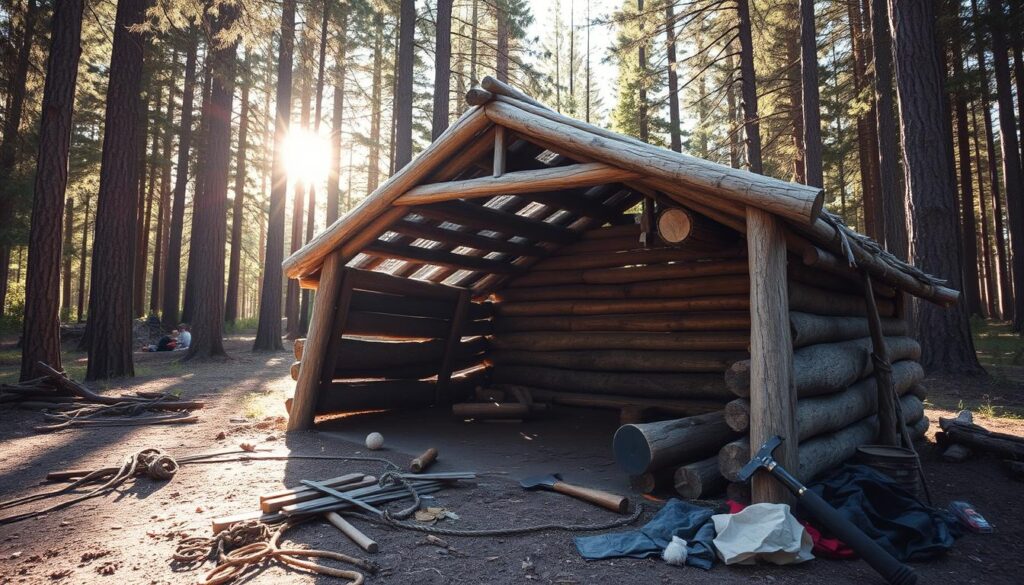
Step-by-Step Construction Process
Building a Lean-to Shelter is easy and requires basic tools and materials. It involves several steps, from gathering materials to adding roof support.
Gathering Materials
The first step is to gather the needed materials. You’ll need sturdy branches or poles for the framework, smaller sticks and leaves or a tarp for the roof, and cordage or rope to hold it all together.
Choose straight, sturdy branches for the main support beams. The size and amount needed will depend on the shelter’s size you want.
Building the Framework
Start by finding a strong stick for the roof’s main support. This stick will be the shelter’s backbone. Place one end on a stable base, like a tree branch or rock, and the other on the ground. This angle will help water run off.
To make it more stable, add sticks to create a tripod or anchor the main beam with rocks or logs.
Material
Usage
Quantity
Sturdy Branches
Framework
3-4
Smaller Sticks
Roofing Support
6-8
Leaves or Tarp
Roofing Material
Enough to cover the roof
Cordage or Rope
Securing the Structure
As needed
Adding Roof Support
After setting up the framework, add smaller sticks across the main beam for roof support. These sticks should be close together to support the roofing material well.
Then, cover the roof with leaves, grasses, or a tarp. Use cordage or rope to secure it tightly. Make sure the roofing material is well-attached to prevent it from being blown away.
By following these steps, you can build a reliable Lean-to Shelter. It will protect you from the elements in a wilderness survival situation.
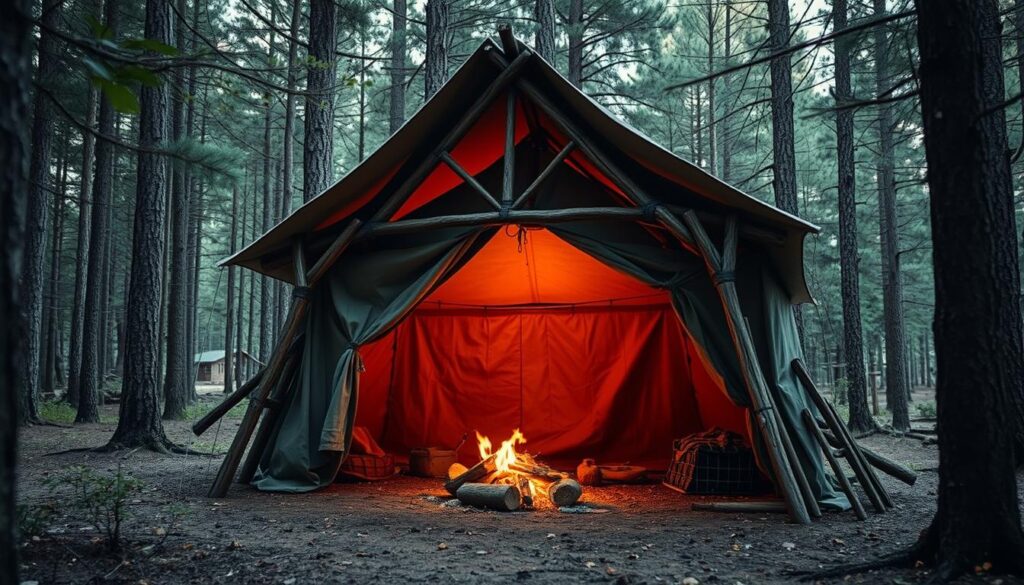
Creating a Weather-Resistant Roof
The roof of a lean-to shelter is key to keeping it dry and safe. It must be built to withstand rain and wind. A good roof keeps the shelter strong and dry.
Choosing the right roofing material is important for a lean-to. Options like plastic sheets, rain ponchos, or tarps are good because they keep water out. They also last long in different weather.
Types of Roofing Options
Choosing the right roofing material is key for staying safe outside. Tarps are great because they’re water-resistant and last long. Rain ponchos can also work if you don’t have other materials.
Think about the weather, what materials you have, and your tools when picking a roof. For heavy rain, a thick, waterproof tarp is best.
Techniques for Securing the Roof
After picking your roof, you need to make sure it stays in place. Use sticks or branches to hold down the edges. Then, tie the roof to the lean-to with rope or cordage.
To make the roof even stronger, you can add more layers or supports. For example, putting leaves or branches on top of the tarp adds weight and keeps it warm.
In short, making a good roof for a lean-to takes the right material and the right way to secure it. This helps keep you safe and dry outside.
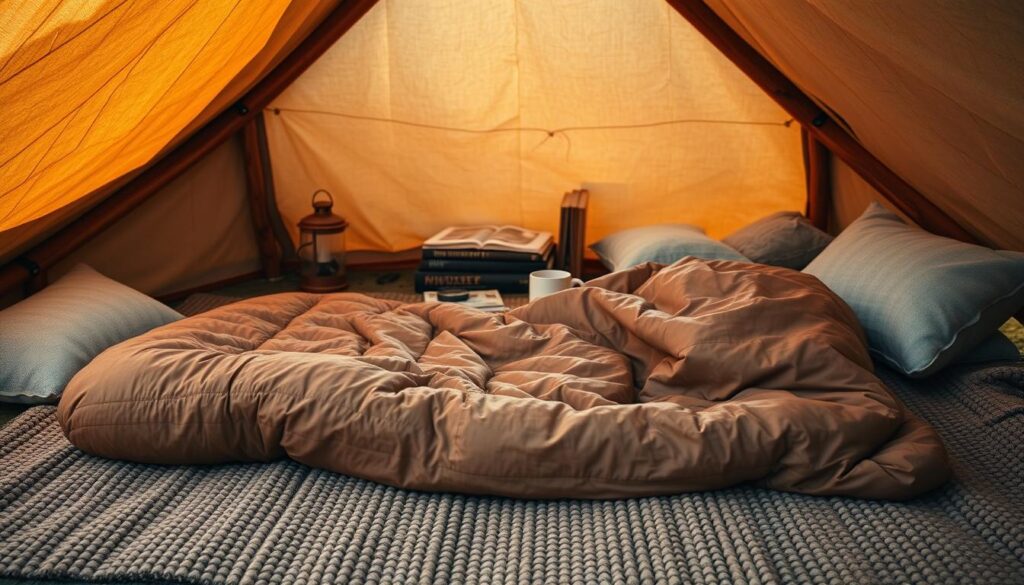
Enhancing Comfort inside Your Lean-to
To truly enjoy your wilderness shelter, focus on making it cozy inside. A DIY shelter like a lean-to can be a great place to rest. But, it’s the small details that make it feel like home.
Selecting the Right Bedding
Choosing the right bedding is key for a comfy stay in your lean-to. A good bed of leaves or pine needles works well. Start by gathering lots of leaves or needles.
Then, make a rectangular frame with logs or branches. Fill it with your gathered material and press it down. This makes a solid, dry bed.
“A good bed is the difference between a restful night and a miserable one.”
Having dry and comfy bedding makes a big difference in your stay.
Insulation Options for Better Warmth
Insulation is vital for staying warm in your lean-to shelter. You can use natural materials like leaves, grasses, or pine needles. They make great insulators.
You can also use a sleeping pad or an emergency blanket. These items help keep you warm.
Insulation Material
Effectiveness
Ease of Use
Leaves/Pine Needles
High
Easy
Sleeping Pad
Medium
Moderate
Emergency Blanket
High
Easy
For more detailed instructions on building a lean-to shelter, check out this guide on lean-to shelter construction.
Maintaining Your Lean-to Shelter
A well-maintained lean-to shelter can make a big difference. It can turn a good wilderness living experience into a great one. Keeping it in good shape is key for your emergency shelter.
Regular Inspections to Prevent Issues
Regular checks are important to catch problems early. I suggest inspecting your lean-to shelter twice a year. Or after any bad weather. Look for cracks, loose parts, or damage from animals.
When you inspect, check if the shelter is strong. Make sure the base is solid and the roof is tight. Fix any damage right away to stop it from getting worse.
Repair Tips for Longevity
Fixing things fast is important. For small problems, like loose screws or small tears, you can fix them yourself. But for big damage, you might need a pro or to replace parts.
To make your shelter last longer, use a protective coat on the wood. Clean it often and keep the area around it clear. This helps prevent damage and keeps it in good shape.
By following these tips, your lean-to shelter will stay reliable for years. It will be a safe place in the wilderness living world.
Safety Considerations While Constructing
When you start building a Lean-to Shelter, remember to watch out for dangers. Keeping safe while you build is just as important as knowing how to build the shelter. Make sure you have the right wilderness skills for the job.
Identifying Possible Hazards
Building a Lean-to Shelter can be risky. You might face falling branches, run into wildlife, or get caught in bad weather. Knowing these dangers is the first step to staying safe.
Look for dead or weak trees that could fall and hurt you.
Stay away from wildlife habitats to avoid disturbing them.
Check the weather forecast to avoid bad conditions.
First Aid Essentials for Emergencies
Even with safety steps, accidents can happen. It’s vital to have a first aid kit ready. This kit helps with minor injuries and stops bigger problems from starting.
Item
Description
Quantity
Bandages
For covering cuts and scrapes
10
Antiseptic wipes
For cleaning wounds
20
Pain relievers
For managing pain
5
Outdoor fans say, “Being ready is key to a safe adventure.” The right gear and knowledge are critical in emergencies.
“The best way to ensure a safe outdoor experience is to be prepared for the unexpected.”
By knowing the dangers and having first aid supplies, you can reduce risks. This way, you can enjoy building your Lean-to Shelter.
Using a Lean-to for Different Activities
A lean-to shelter is great because it can be used in many ways. It’s perfect for outdoor lovers and homeowners who need extra storage. A lean-to is a handy addition to any setup.
Shelter for Camping Trips
A lean-to is a cozy and dry place to stay on camping trips. Its easy design makes it perfect for wilderness survival shelter needs.
A Workshop or Storage Space
You can also use a lean-to as a workshop or storage area in your yard. It’s great for keeping outdoor gear organized or for DIY projects.
Activity
Lean-to Use
Benefits
Camping
Shelter
Provides dry and comfortable refuge
Storage
Storage Space
Keeps equipment organized and protected
DIY Projects
Workshop
Offers a dedicated workspace
The lean-to construction is very versatile. It’s useful for camping, storing things, and as a workshop.
Personalizing Your Lean-to Design
Making your lean-to shelter unique is about adding the right touches. These can be both decorative and functional. As you settle into your wilderness shelter, personalization can make your outdoor survival experience better.
One easy way to personalize your lean-to is by adding decorative elements. These should reflect your personality or match the natural surroundings. You can use natural materials like pinecones, leaves, or flowers for decor. Or, hang your favorite ornaments or personal items to make it feel like home.
Adding Decorative Touches
Decorating your lean-to should be simple and in harmony with nature. Use materials found around you to create a cozy atmosphere. For example, candles or a small lantern can add warmth and light.
You can also bring comforts from home. A favorite blanket or cherished books can make your lean-to feel more personal.
Practical Modifications for Functionality
Practical changes can also make your lean-to better. Adding storage solutions like baskets or shelves can keep your gear organized. Improving comfort by adding insulation or a raised bed can also help.
Upgrade your sleeping area with a comfortable sleeping bag or pad.
Install a small table or workbench for preparing meals or working on projects.
Implement a system for organizing your gear, such as hooks or a pegboard.
By mixing decorative touches with practical changes, you can make a lean-to that’s both functional and personal. This makes your wilderness shelter experience more enjoyable.
Real-Life Applications and Experiences
Outdoor lovers have shared many stories about building and using lean-to shelters. These stories show how well these DIY shelters work.
Stories from the Wilderness
Many say a lean-to shelter has changed their outdoor adventures for the better. It gives them a sense of safety and comfort. For example, making an emergency shelter from nature can save lives in bad weather.
Lessons from Experience
These stories teach us the value of picking the right materials and design for our shelters. By learning from others, we can make a better DIY shelter. This improves our outdoor adventures.
FAQ
What is a lean-to shelter, and how does it differ from other types of shelters?
A lean-to shelter is a simple structure with a sloping roof. It’s easy to make and needs little material. This makes it perfect for survival in the wild or outdoors.
What are the essential materials needed to build a lean-to shelter?
To build a lean-to, you’ll need branches, leaves, and pine needles. You’ll also need a knife, rope, and a tarp or plastic sheet for extra protection.
How do I choose the right location for my lean-to shelter?
Choose a spot close to water, with good drainage and protection from the weather. It should be flat and safe from hazards.
What are some common mistakes to avoid when building a lean-to shelter?
Avoid spots with bad drainage and make sure the roof is secure. Use insulation and bedding to stay warm and comfy inside.
Can a lean-to shelter be used for purposes other than camping or emergency shelter?
Yes, lean-to shelters can be used for many things. They’re great for workshops, storage, or even as a backyard feature because they’re easy to build.
How can I personalize my lean-to shelter to suit my needs?
You can add decorations like lanterns or wind chimes. You can also make it more useful by adding shelves or a door.
What safety considerations should I keep in mind when building a lean-to shelter?
Be careful of falling branches and sharp objects. Always have first aid stuff ready and be ready for emergencies.
How can I maintain my lean-to shelter to ensure its longevity?
Regular checks and repairs are key to keeping your shelter in good shape. Look for damage and fix it to keep it safe and useful.