When you go into the wilderness, a good outdoor shelter is essential. I once found myself in a situation where a well-made shelter saved me from bad weather. I want to share this important skill with you.
Creating a survival shelter is key in the wilderness. It protects you from wind, rain, cold, and bugs. In this guide, I’ll show you how to make a durable and waterproof shelter.
If you love the outdoors or need to be ready for emergencies, this guide is for you. It will teach you how to build a strong weatherproof shelter.
Key Takeaways
Understand the importance of a survival shelter in wilderness situations.
Learn the essential steps to build a durable and waterproof shelter.
Discover the necessary materials and tools required for the task.
Gain knowledge on how to choose the right location for your shelter.
Understand how to ensure your shelter is suitable for various weather conditions.
Understanding Weatherproof Shelters
A weatherproof shelter is more than just a place to hide. It’s a strong defense against the weather. Let’s explore what makes a shelter weatherproof, its benefits, and how it’s used.
What Is a Weatherproof Shelter?
A weatherproof shelter keeps you safe from rain, wind, and cold. It’s built with special materials and methods. For example, tarp shelters for camping and backpacking are light, water-resistant, and keep out drafts.
Key Benefits of Weatherproofing
Weatherproof shelters are durable, safe, and comfy. They stand up to bad weather, giving you a safe place. Here are the main benefits:
Enhanced Durability: Lasts longer, needing less repair.
Improved Safety: Keeps you safe from harsh weather.
Increased Comfort: Keeps a cozy inside, no matter outside.
Common Uses and Applications
Weatherproof shelters are used in many ways. They’re great for fun and for emergencies. Here are some common uses:
Camping and backpacking, for a comfy shelter in nature.
Emergency shelters, for quick safety in disasters.
Outdoor storage, to keep gear and supplies dry.
Knowing these points helps choose or build the right weatherproof shelter for you.
Planning Your Weatherproof Shelter
Building a weatherproof shelter starts with careful planning. It involves several key steps. When I build an all-weather shelter, I think about what makes it last and work well.
Identifying the Location
Finding the right spot for a shelter is important. It should protect from the weather naturally. Experts say it should also be near food and water and have good visibility.
I look for a place that’s dry, flat, and safe from bad weather.
Some things to think about when picking a spot include:
Being close to water
Being protected from wind, rain, and sun
Being able to see threats
Having good drainage to avoid water
Assessing Your Space Needs
Figuring out how much space you need is key. I think about how many people will use it, what activities will happen there, and where to store things.
Getting the space right means the shelter is just the right size. Things to consider are:
How many people will use it
The activities that will happen inside
Where to put equipment and supplies
Choosing the Right Materials
Picking the right materials is essential for a durable shelter. I choose materials that are strong, waterproof, and fit the local weather.
Waterproof fabrics for the roof and walls
Durable frames that can handle wind and rain
Insulation to keep the temperature right
Essential Tools for Construction
To build a reliable camping shelter, you need the right tools. These tools make the job easier and ensure your shelter is safe and strong.
Hand Tools That Make a Difference
Hand tools are key for any construction job, like building a weatherproof shelter. You’ll need a hammer for driving stakes, a saw for cutting wood, and a knife for different tasks. A good knife is more than a tool; it’s a friend in the wilderness.
“A good knife is not just a tool, it’s a companion in the wilderness.”
Other important hand tools include a tape measure for precise measurements, a level to keep things straight, and screwdrivers for putting things together.
Hand Tool
Use
Hammer
Driving stakes into the ground
Saw
Cutting wood to required sizes
Knife
Various tasks such as cutting rope or paracord
Power Tools for Efficiency
Power tools are also essential for building a shelter. A power drill makes screwing easier, and a circular saw cuts wood fast and right.
Key Power Tools:
Power Drill
Circular Saw
Impact Driver
Safety Gear and Precautions
When building a shelter, safety is a top priority. You’ll need gloves to protect your hands, safety glasses to keep your eyes safe, and a first-aid kit for any accidents.
Always wear protective gear when using power tools or handling sharp objects.
Safety Gear
Purpose
Gloves
Protect hands from cuts and abrasions
Safety Glasses
Shield eyes from debris
First-Aid Kit
Treat minor injuries
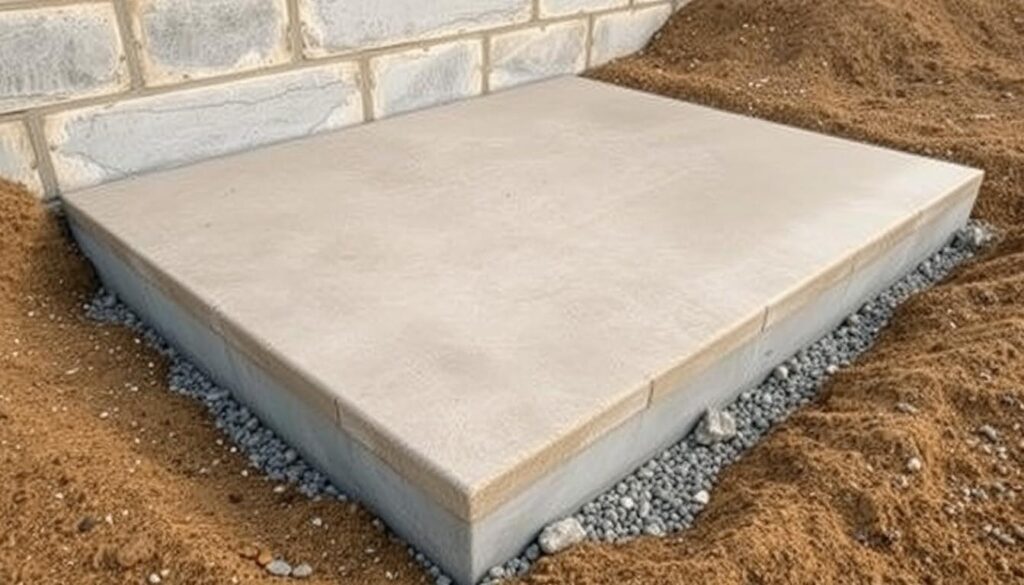
Step1: Laying the Foundation
A strong foundation is key for your weatherproof shelter’s long life and performance. It gives the shelter the stability and support it needs to face different weather conditions.
Types of Foundations
There are many foundation types for your weatherproof shelter, like slab, crawl space, and full basement foundations. Each has its own benefits and fits different terrains and climates.
Foundation Type
Description
Suitability
Slab Foundation
A concrete slab that serves as the base of the shelter.
Stable soil, warm climates
Crawl Space Foundation
A foundation that elevates the shelter, providing access for maintenance.
Areas with high rainfall, uneven terrain
Full Basement Foundation
A foundation that includes a fully underground basement.
Areas with cold climates, stable soil
Preparing the Ground
Preparing the ground is a vital step. It involves clearing the land, removing debris, and leveling the ground. Clearing and leveling are essential for a stable foundation.
Experts say not preparing the ground right can cause problems. These include uneven settling and water buildup.
Ensuring Proper Drainage
Good drainage is key to keep water away from the shelter. You can do this by grading the land and using drainage systems like French drains.
Grade the land to ensure it slopes away from the shelter.
Install a drainage system to direct water away from the foundation.
Use waterproof materials to prevent water seepage.
By focusing on these steps, your weatherproof shelter will have a solid foundation. This will make it more durable and effective.
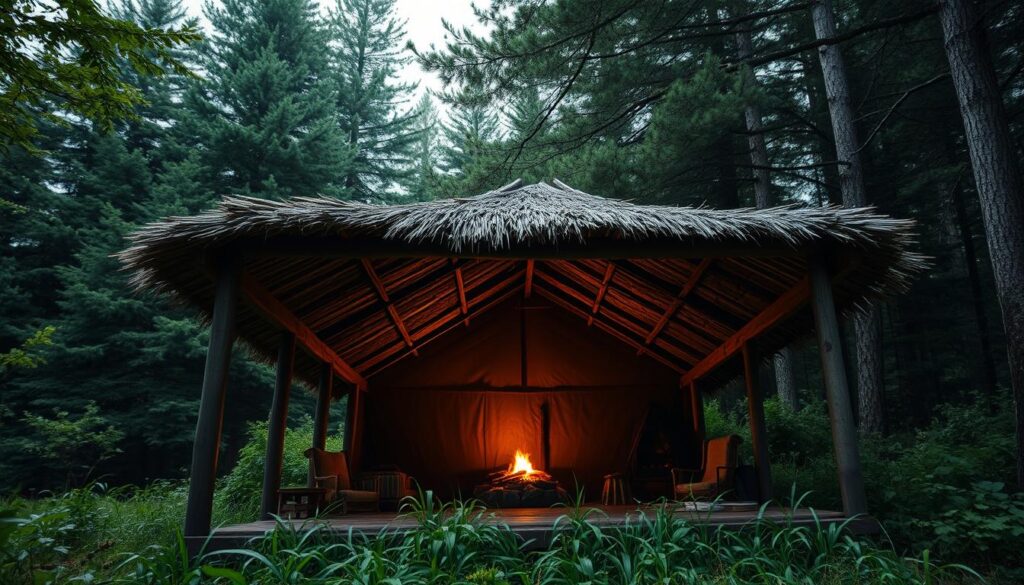
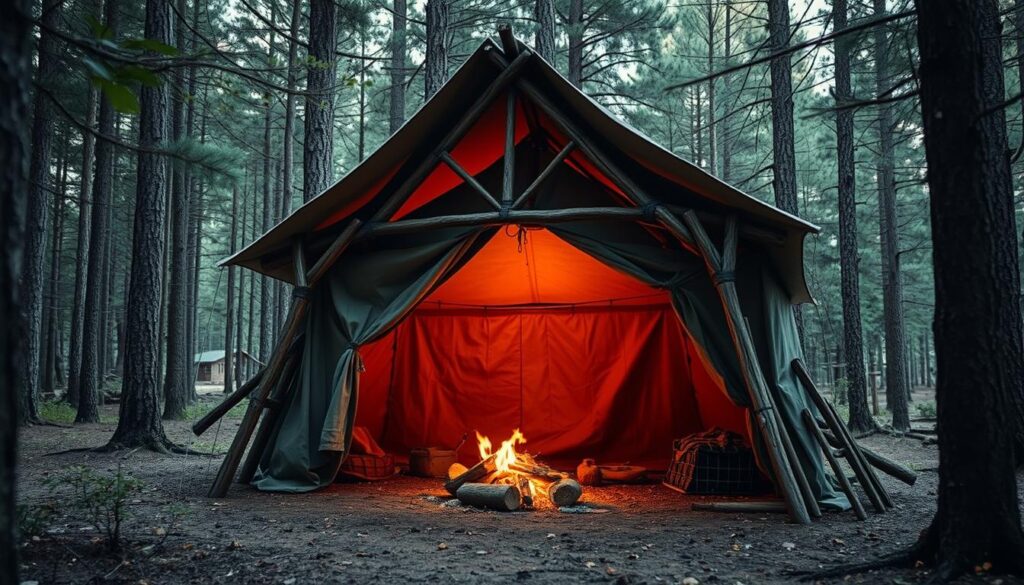
Step2: Constructing the Frame
The frame of your shelter is its backbone. It gives your waterproof shelter the structure it needs. A strong frame helps your shelter stand up to rain, wind, and more.
Selecting Frame Materials
Choosing the right materials for your frame is key. You can use wooden poles, metal rods, or even old PVC pipes. Pick materials that are tough, won’t rot or rust, and can hold the weight of the roof and any extras.
For example, a lean-to shelter can be built with two trees, a ridge pole, and smaller sticks. For more tips on building a survival shelter, check out this guide on building an A-frame Survival Shelter.
Building Techniques for Stability
To make your shelter stable, use strong building techniques. Anchor the frame to the ground, add diagonal bracing, and make sure all joints are tight.
Diagonal bracing is key for even force distribution. For extra strength, use reinforced joints or brackets.
Integrating Design Features
Adding design features can make your outdoor shelter better. Think about a sloping roof for water runoff or a frame that fits windows or a door.
Also, design with your local climate in mind. For snowy areas, a steeper roof helps keep snow off.
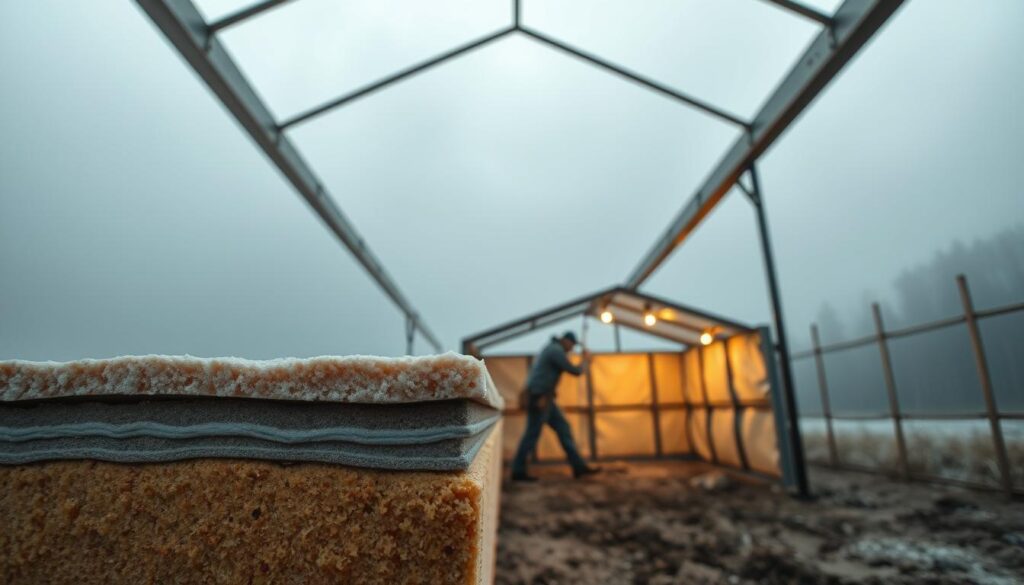
Step3: Adding Weatherproofing Elements
The third step in building a weatherproof shelter involves adding key elements. These elements make the shelter durable and all-weather.
At this stage, focus on insulation, waterproofing, and weather-resistant fabrics. Good insulation keeps the shelter warm. Waterproofing and weather-resistant materials protect against rain and wind.
Insulation Options
Insulation is key for a comfortable shelter. You can use natural materials like leaves, moss, and pine needles. The right insulation depends on what you have and your shelter’s needs.
Using leaves or moss is a good and green way to keep warm. These materials are easy to find outside, making them handy.
Waterproofing Methods
Waterproofing is vital for a weatherproof shelter. You can use waterproof coatings, membranes, or water-resistant materials.
Applying a waterproof coating is a good method. You can find many products on the market. Make sure to apply it right and cover all surfaces.
Selecting Weather-Resistant Fabrics
Choosing the right fabric for your shelter’s outside is important. Look for durable, weather-resistant materials like canvas, polyester, or nylon. Consider UV resistance, water repellency, and breathability for comfort and protection.
For example, UV-resistant fabrics protect against sun damage. Water-repellent fabrics keep water out. The right balance makes your shelter durable and functional.
Step4: Installing the Roof
Installing the roof is key to making a weatherproof shelter. It needs careful planning and execution. The roof protects the shelter from the weather.
When picking a portable shelter or a camping shelter, the roof’s design and installation are very important. A good roof keeps the shelter dry and safe, even in bad weather.
Types of Roofs for Weatherproofing
There are many roof types for weatherproofing, including:
Flat roofs, which are simple and effective for small shelters.
Gabled roofs, which offer excellent water runoff.
Dome-shaped roofs, which provide structural strength and wind resistance.
For a portable shelter, a dome-shaped or gabled roof is better. They shed water well and resist wind.
Proper Angles and Drainage
The roof’s angle is key for water drainage. A steeper angle helps water run off fast, preventing leaks. For tips on preparing your shelter for weather, see this guide.
Good drainage is also important. Make sure the roof is smooth and add gutters or downspouts. This directs water away from the shelter’s base.
Material Choices for Durability
The roof’s material affects its durability and weather resistance. Common materials include:
Material
Durability
Weather Resistance
Asphalt Shingles
High
Good
Metal Roofing
Very High
Excellent
Canvas
Moderate
Fair
For a camping shelter, waterproof canvas is a good choice. It’s durable and portable.
Step5: Finishing Touches
Now that your shelter’s basic structure is done, it’s time to focus on the details. These details will make your shelter safe in harsh weather.
Doors and Windows That Seal
The key to a weatherproof shelter is keeping the elements out. This means having doors and windows that seal properly. Use weatherstripping around doors and windows to block air leaks and water.
For extra protection, think about adding storm flaps or covers over windows.
Use weatherstripping to seal gaps around doors and windows.
Install storm flaps or covers for extra protection.
Choose doors and windows designed for weather resistance.
Additional Weatherproof Accessories
There are many additional weatherproof accessories to make your shelter last longer. These include waterproof coatings for walls and roofs, and strong anchoring systems for high winds. Studies show that a barrier or cover at the entrance helps a lot against wind and rain.
Apply waterproof coatings to walls and roofs.
Use reinforced anchoring systems for stability.
Consider adding gutters and downspouts to manage rainwater.
Aesthetic Considerations
Functionality is important, but your shelter’s look matters too. Pick materials and colors that match the surroundings. This makes your shelter less noticeable.
Adding some greenery around the shelter can also improve its look. It helps it blend into the landscape.
Maintenance Tips for Longevity
Keeping your weatherproof shelter in good shape is key to its long life. Regular care not only makes it last longer but also keeps it safe and working well.
Routine Inspections to Perform
It’s important to check your shelter often to catch problems early. Look at the frame, roof, and walls for damage or wear. Also, check the weatherproofing elements, like seals and coatings, to make sure they’re working right.
Don’t forget to check the foundation too. Make sure it’s stable and not showing signs of erosion or water damage.
Repairing Common Issues
If you find any damage during your checks, fix it right away. Issues like torn fabric, broken frames, or bad weatherproofing need quick attention. For fabric shelters, you can use patch kits or reapply waterproof coatings. For bigger problems, like broken frames, you might need to replace parts.
Getting your shelter ready for winter is very important. Start by cleaning it well and removing any debris. Make sure the insulation is enough for the cold.
For outdoor shelters, think about how much snow it can handle. You might need to make the roof stronger or remove snow to avoid collapse. Also, check the drainage system to handle melting snow.
Maintenance Task
Frequency
Importance Level
Inspect shelter structure
Monthly
High
Check weatherproofing elements
Quarterly
High
Clean the shelter
Bi-annually
Medium
Prepare for winter
Annually
High
Real-Life Examples of Weatherproof Shelters
Weatherproof shelters are used in many places, like camping tents and backyard sheds. They show how important it is to protect against the weather. They also prove how well they work in different situations.
Backyard Sheds
Backyard sheds are a great example of weatherproof shelters. A durable shelter here keeps gardening tools and outdoor gear safe from bad weather. For example, using waterproof materials on the roof and walls helps the shed last longer.
Use waterproof coatings on the roof and walls.
Ensure proper drainage to prevent water accumulation.
Select materials that are resistant to rot and insect damage.
Camping Tents
Camping tents also need to be weatherproof. A waterproof shelter makes camping better, keeping you dry and comfy in rain or snow. For more tips on survival shelters, check out Outdoor Life’s guide on survival shelters.
Choose tents with waterproof and breathable fabric.
Seal seams and zippers to prevent water entry.
Use a rain fly to add an extra layer of protection.
Emergency Shelters
Emergency shelters are key in disasters, giving quick protection from the weather. They need to be easy to set up and very strong. Using weatherproof materials and designs can save lives in emergencies.
Utilize lightweight yet strong materials for the structure.
Design the shelter with ease of assembly in mind.
Incorporate features that protect against wind and rain.
Conclusion: Your Weatherproof Shelter is Ready!
Now that your all-weather shelter is built, make sure everything works right. Use a final checklist to check if your portable shelter is ready for use.
Inspecting Your Shelter
Do a detailed check to make sure your shelter is up to standard. Look for any damage or issues with the materials. Also, check that all weatherproofing is done correctly.
Preparing for Seasonal Changes
As the seasons change, your shelter might need some tweaks. Keep an eye on the weather forecast. Make any needed changes to keep your shelter safe from bad weather.
Future Projects and Expeditions
Building a weatherproof shelter might inspire you to tackle bigger projects or go on wilderness adventures. Think about learning more about wilderness survival. This can make your outdoor adventures even better.
FAQ
What is the primary purpose of a weatherproof shelter?
A weatherproof shelter keeps you safe from rain, wind, and cold. It makes your stay more comfortable and safe.
How do I choose the right location for my weatherproof shelter?
Pick a spot that’s dry, flat, and away from bad weather. This helps your shelter last longer and stay stable.
What are the essential tools required for constructing a weatherproof shelter?
You’ll need hand tools like hammers and saws. Also, power tools and safety gear like gloves and glasses are important. A first-aid kit is a must for safety.
What type of foundation is best for a weatherproof shelter?
The foundation depends on your needs. But, make sure the ground is ready and drains well to keep water away.
How can I make my shelter’s frame more stable?
Choose strong materials for the frame. Use building methods that keep it stable. Add design features to make it better.
What are some effective waterproofing methods for my shelter?
Use waterproof coatings and weather-resistant fabrics. Also, make sure water drains away to keep your shelter dry.
How often should I inspect my weatherproof shelter?
Check your shelter often. Look for problems and fix them quickly. This keeps your shelter safe and working well.
Can I use my weatherproof shelter in extreme weather conditions?
Yes, a good shelter can handle bad weather. But, make sure it’s ready for winter and extreme temperatures.
What are some common applications of weatherproof shelters?
Weatherproof shelters are great for camping, backpacking, and emergency use. They’re also good for storing things outside.
How can I maintain my weatherproof shelter’s durability?
Regular checks and quick repairs are key. Also, get your shelter ready for the seasons to keep it in top shape.