I remember the day I had to build a wilderness shelter to survive an unexpected night in the woods. It was a humbling experience. It taught me the importance of being prepared and knowing the basics of outdoor survival.
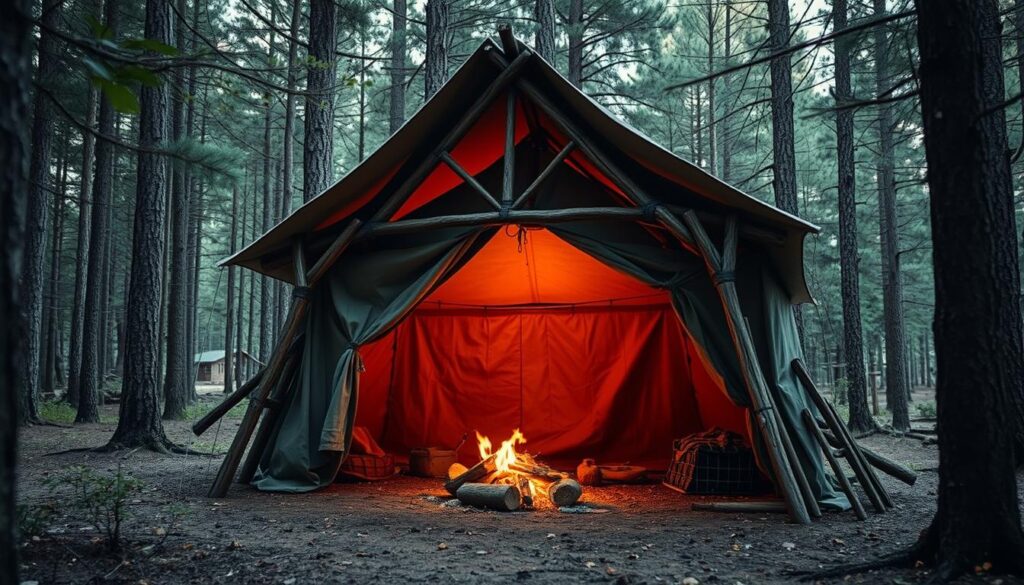
Building a shelter can be a matter of life and death. It protects you from harsh weather and wildlife. Nathan Roarke’s step-by-step guide on constructing a Full Debris Shelter was invaluable. It provided a clear and actionable approach to creating a reliable outdoor shelter.
My experience has shown me that having the right knowledge can make all the difference in a survival situation. In this article, I’ll share the key steps to building a debris shelter. This will ensure you’re better prepared for your next wilderness adventure.
Key Takeaways
- Understand the importance of a wilderness shelter in survival situations.
- Learn the basic steps to construct a reliable outdoor shelter.
- Discover how to prepare for unexpected nights in the wilderness.
- Gain confidence in your ability to survive using a debris shelter.
- Apply Nathan Roarke’s guide to build a Full Debris Shelter.
What Inspired Me to Build a Debris Shelter
My journey to build a debris shelter began with learning about the vital role of shelters in survival. I read articles from experts like Jason Knight and Nathan Roarke. They showed me how important a shelter is for staying warm and surviving in the wild.
Shelters are key in survival. They protect us from bad weather, animals, and other dangers. This made me want to learn more about survival shelters and how to make them from nature’s materials.
A Growing Interest in Survival Skills
I became more interested in survival skills. I looked into different shelters, like emergency shelters and improvised shelters. I found out debris shelters are effective and simple to make with basic tools.
For more info on debris huts, check out this detailed article.
The Appeal of Natural Materials
Building with natural materials has many benefits. It’s good for the environment and tests our ability to survive. Key advantages include:
- Availability of materials
- Minimal environmental impact
- Cost-effective
- Opportunity to develop survival skills

Gathering and building materials was a learning experience. It taught me about debris shelter construction and the importance of preparation and mindset in survival.
The Location: Choosing the Right Spot
Choosing the right spot for a debris shelter is key. It affects how well the shelter lasts and keeps you safe.
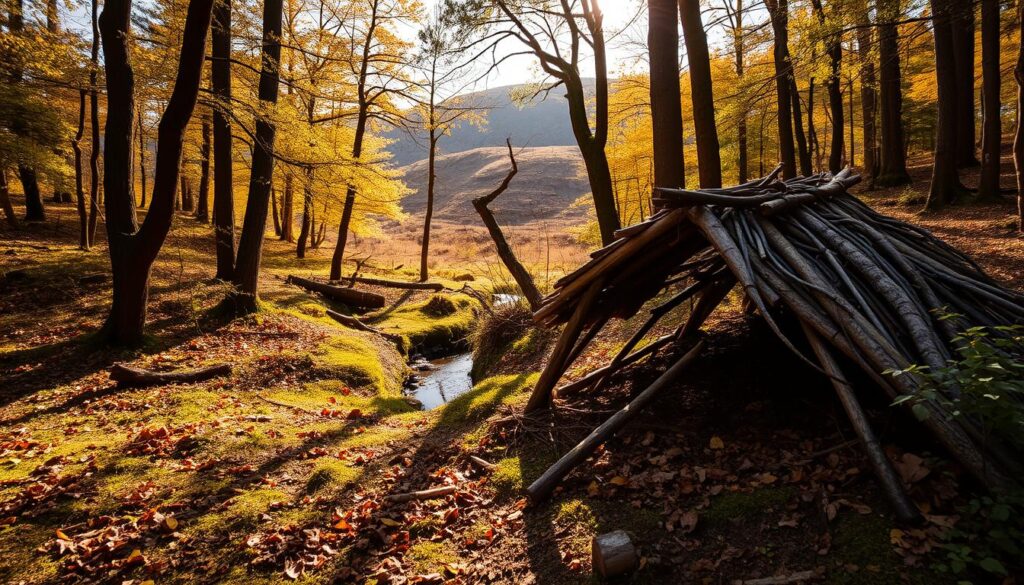
First, check the natural resources in your area. Look for materials like branches, leaves, and other organic stuff. Having lots of these nearby makes building easier and blends the shelter with nature.
Assessing Natural Resources
Checking the availability of natural materials is important. Find places with lots of debris, like fallen trees and thick plants. This saves you energy by being closer to your site.
Also, think about the terrain. A flat area is better than a slope. It makes your debris hut more stable.
Evaluating Safety and Shelter Options
Safety comes first when picking a spot for your shelter. Stay away from floodplains, landslide zones, and dead trees. Choose a spot with natural protection, like trees or rocks, for extra safety.
Also, think about how close you are to water. Having water nearby is good, but avoid flooded or wet areas. They could make your shelter site dangerous.
By looking at these things, you can find a good spot for your shelter. It will be safe and work well.
Essential Tools and Materials Required
To build a strong outdoor shelter, you need the right tools and materials. Making a debris shelter depends a lot on what you can find and use.
For my debris shelter, I needed a few key tools. A sharp knife helped me cut branches. A sturdy rope was used to tie everything together. And a stone hammer was great for pounding stakes into the ground.
Tools I Used for Construction
The tools I picked were simple but worked well. The knife was key for cutting and shaping wood. The rope kept the shelter’s frame strong. And a stone or a piece of hardwood was my hammer for driving stakes.
- A sharp knife for cutting and shaping wood
- A durable rope for securing the structure
- A stone or wooden hammer for driving stakes
Finding Natural Materials in the Wilderness
The wilderness was full of materials I needed for my survival shelter. I looked for straight branches and saplings for the frame. Flexible branches were perfect for the roof’s lattice.

Leaves, grasses, and pine needles were great for thatching and insulation. The goal was to find materials that were plenty, strong, and right for the job. Long grasses and reeds were perfect for thatching, keeping the shelter dry.
With these natural materials and basic tools, I built a solid emergency housing shelter. It could handle different weather conditions.
Step-by-Step Guide to Building the Shelters
In this section, I will outline the steps I took to build a debris shelter. Building a debris shelter is a multi-step process. It requires patience, the right materials, and a clear understanding of the construction process.
Gathering Materials: The First Phase
The first step in building a wilderness shelter is gathering materials. I collected branches, leaves, and other natural materials. These materials provide insulation and protection from the elements.
I looked for sturdy branches for the shelter’s frame. I also gathered softer materials like leaves and pine needles for insulation. The area around my chosen location had everything I needed.
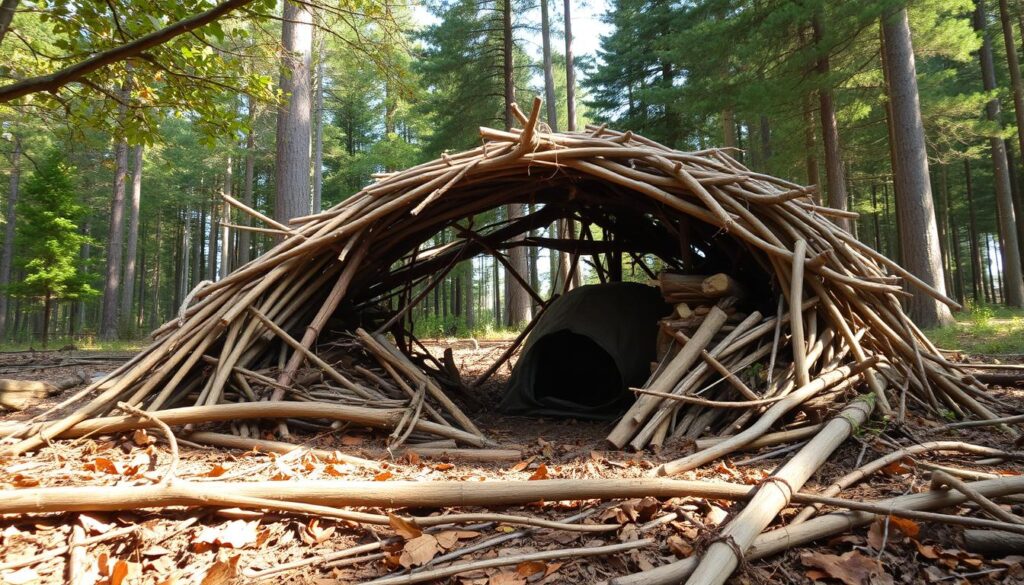
Constructing the Frame: My Approach
With materials gathered, the next step was building the frame. I started with a simple lean-to structure using thick branches. I placed two sturdy branches parallel to each other on the ground.
Then, I leaned other branches against them to form a slope. This design allows water to run off and provides a stable structure. I used thinner branches and flexible saplings to tie the frame together.
This ensured it was stable and could withstand wind and rain. The frame was designed to be compact. It provided enough space for me to sit or lie down comfortably.
Adding Insulation: Keeping Warm
The final step was adding insulation. I used leaves and pine needles to cover the frame. I started from the bottom and worked my way up.
This layer of insulation is key for keeping warm and dry. I made sure to cover the entire structure. This left no gaps for cold air or moisture to penetrate.
By following these steps, I built a reliable debris shelter. It provided me with protection and warmth during my time in the wilderness.
Key Considerations for Durability
A debris shelter’s durability depends on several key factors. These ensure its stability and weather resistance. When building a survival shelter, it’s essential to consider these factors. This ensures the shelter remains safe and secure over time.
Reinforcing the Shelter Against Weather
One of the primary considerations for durability is reinforcing the shelter against various weather conditions. This includes using sturdy materials for the frame. Covering it with a waterproof layer protects against rain and wind. According to experts like Nathan Roarke, securing the ridge beam is key for maintaining the structure’s integrity during harsh weather.
To achieve this, I used a combination of natural materials found in the wilderness. This includes branches and leaves, along with some rope to tie the structure together. For more detailed guidance on building a reliable survival shelter, you can refer to my guide on crafting a reliable survival shelter.
Importance of Structure Stability
The stability of the shelter’s structure is equally important for its durability. A stable structure can withstand external forces like wind and snow more effectively. Jason Knight emphasizes the importance of making the shelter durable and resistant to weather conditions. To ensure stability, it’s essential to construct the frame carefully and anchor it securely to the ground.
- Use sturdy materials for the frame.
- Anchor the structure securely to the ground.
- Regularly inspect the shelter for any damage or weaknesses.
By focusing on these key considerations, you can build a temporary shelter that is not only durable but also safe and reliable. Whether you’re a seasoned outdoorsperson or just starting to learn survival skills, understanding the importance of durability in shelter construction is vital.
Personal Experiences During Construction
Building a debris hut was a journey filled with surprises. I started with a mix of excitement and worry. Creating an outdoor shelter that could handle nature’s forces was a test of my will and a learning experience.
Challenges Faced and How I Overcame Them
Finding the right materials for the debris hut was a big challenge. The wilderness had plenty, but I had to pick carefully. I looked far into the woods for the best branches and leaves.
I solved this by organizing my material search. I sorted materials by type and urgency. This made finding what I needed easier and faster.
For more on building shelters, check out my story on building an off-grid cabin. It shows how similar debris hut building is in terms of picking materials and building strong.
Learning Through Trial and Error
Building the shelter was a steep learning curve. At first, my attempts at building the frame failed. It was tough, but I learned the value of a strong base.
Through trying and failing, I became more patient and careful. I noticed how branches naturally lean and used that to build a stable frame. Here’s what I learned:
| Challenge | Lesson Learned | Outcome |
|---|---|---|
| Gathering materials | Systematic approach to material collection | Efficient gathering process |
| Structural collapses | Importance of a solid foundation and natural inclination of branches | Stable debris hut structure |
Building a debris hut was more than just making a shelter. It taught me survival skills like being resourceful, patient, and observant. Looking back, I see how important perseverance and hands-on learning are.
Tips for Anyone Wanting to Build Their Own
Building a debris shelter is key for anyone wanting to improve their survival skills. I learned a lot by doing it myself, and I’m excited to share my experiences with you.
Start Small: Learning as You Go
One of the most important tips is to start small. Don’t aim to build a complex survival shelter at first. Start with a simple structure and add more as you get better. This way, you’ll learn the basics of building an improvised shelter without feeling overwhelmed.
I began by collecting materials and building a basic frame. As I grew more confident, I added insulation and a stronger frame. This step-by-step approach helped me learn and adapt without feeling too stressed.
Resources That Helped Me
Several resources were very helpful during my project. Jason Knight’s article on building a debris hut gave me great starting tips. Nathan Roarke’s guide on building a full debris shelter also offered useful advice.
Some top resources I suggest include guides on emergency housing and wilderness survival. These resources gave me practical tips and showed me the importance of adapting to different environments.
By using these resources and starting small, you can learn to build a dependable survival shelter. Remember, patience and a willingness to learn are key.
Maintenance of My Debris Shelter
Building a debris shelter is just the start. Keeping it up is key. A wilderness shelter needs regular checks to stay safe and work right.
Regular upkeep makes the shelter last longer. It also keeps it strong during bad weather. If you ignore it, the shelter can weaken and lose its strength.
Seasonal Checks and Repairs
I do seasonal checks to keep my shelter in top shape. I look for damage from weather like heavy rain or strong winds.
- Check the roof for any signs of leakage or damage.
- Inspect the frame for any weakening of the branches or poles.
- Ensure that the insulation remains dry and effective.
I also check for wear and tear on the materials. This helps me fix small problems before they get big. For example, re-tying loose branches or replacing damaged leaves can stop bigger issues.
Adapting the Shelter for Different Weather
It’s important to adjust my debris shelter for different weather. In winter, I add more insulation to stay warm. This might mean adding leaves or snow to the shelter.
In rainy weather, I make sure the shelter stays dry. I check the roof for leaks and ensure the drainage works well.
By changing my shelter for the weather and doing regular upkeep, it stays safe and reliable. This boosts my wilderness survival skills and gives me peace of mind on outdoor trips.
Reflections on the Experience
Building a debris shelter in the wilderness was a life-changing experience. It taught me a lot about survival and being self-reliant. Reflecting on it, I see that making an improvised shelter did more than just keep me safe. It also made me feel closer to nature.
Wilderness Survival Insights
This project gave me real-world experience with wilderness survival. I learned how to use natural materials to build a shelter. I realized that knowing how to survive can be a big advantage.
Impact on Outdoor Adventures
Learning to build an improvised shelter has made a big difference in my outdoor adventures. I feel more confident and ready for anything when I’m in the wilderness. This experience has also made me want to keep learning and sharing survival skills. People like Nathan Roarke and Jason Knight inspire me to do the same.
FAQ
What is a debris shelter?
A debris shelter is a shelter made from natural materials like branches and leaves. It’s built in the wilderness.
Why is it important to build a debris shelter?
It’s key in survival situations. It protects you from bad weather, wildlife, and other dangers.
What are the essential tools required to build a debris shelter?
You’ll need a knife, saw, or other tools for cutting. Also, cordage or twine to hold the structure together.
How do I choose the right location for building a debris shelter?
Look for places with good building materials. Also, check if it’s safe from wind, rain, and animals.
What are some tips for making a debris shelter durable?
Use strong materials and build a solid structure. Regularly check and fix it to withstand weather.
How do I maintain my debris shelter?
Do seasonal checks and repairs. Adjust it for different weather, like adding insulation in winter or better drainage in rain.
Can I use a debris shelter as a permanent residence?
No, it’s best for temporary or emergency use. It’s not durable or comfortable enough for long-term living.
What are some common mistakes to avoid when building a debris shelter?
Don’t pick a bad spot, use the wrong materials, or not secure it well. These can cause it to collapse or get damaged.
How can I improve my debris shelter building skills?
Start with simple shelters and practice. Get tips from outdoor experts or survival guides.