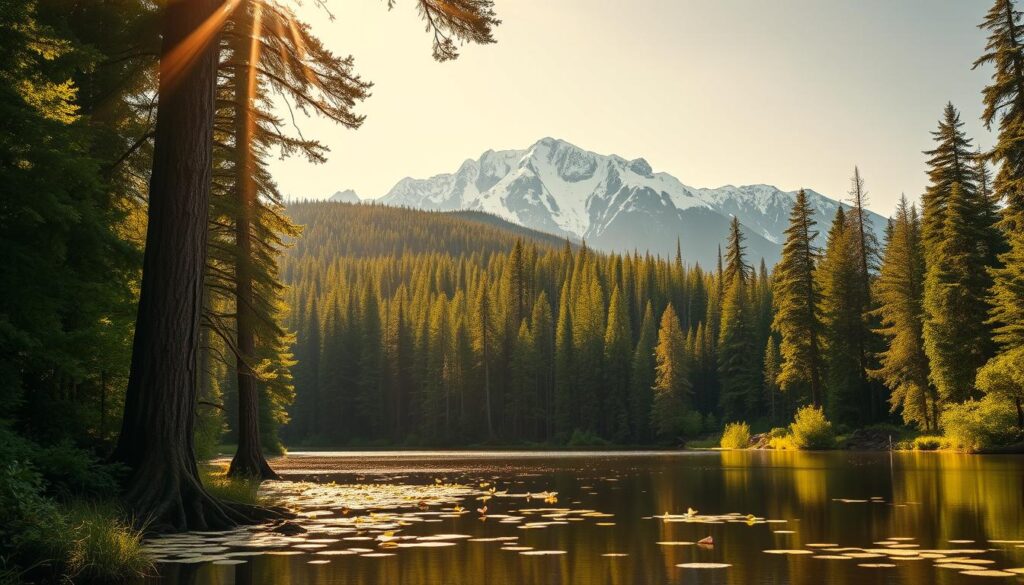
I love spending time outdoors, but the weather can be unpredictable. One minute it’s bright, the next, a storm hits and you need shelter fast. That’s why I learned to make a Tarp Shelter. It’s more than just keeping you dry; it’s a safe place to be when the weather gets rough.
On a tough hike, my simple shelter saved the day. It showed me how vital a sturdy and reliable shelter is for any outdoor trip. Here, I’ll tell you how to make a Tarp Shelter that keeps you dry and comfy, even when it’s bad outside.
Key Takeaways
- Understanding the importance of a reliable shelter for outdoor adventures
- Learning the key components of a sturdy Tarp Shelter
- Discovering the benefits of a well-built shelter in harsh weather conditions
- Identifying the essential materials needed for building a Tarp Shelter
- Understanding the steps involved in constructing a reliable shelter
Understanding the Importance of a Tarp Shelter
For those who love spending time outdoors, a tarp shelter is a great choice. It’s lightweight and protects you from the weather. I found out that a tarp shelter is more than just fabric. It’s a key part of a great camping trip.
What Is a Tarp Shelter?
A tarp shelter is a simple, portable way to stay dry. It’s made of waterproof fabric stretched over a frame. This frame can be made from poles, trees, or rocks. Its simplicity and adaptability make it perfect for backpackers and campers who prefer light gear.
Benefits of Using a Tarp Shelter
Using a tarp shelter has many advantages. It’s significantly lighter than tents, which is great for long hikes. It’s also quick to set up, perfect for sudden rain or sun. Plus, it lets you feel closer to nature. For more on its benefits, check out this resource.
Common Features of Effective Tarp Shelters
Good tarp shelters have some key features. They’re made from waterproof and durable materials to handle bad weather. They should let water run off and have good ventilation to avoid moisture. They should also be easy to set up and secure, with features like grommets and stakes. When picking or making a tarp shelter, keep these features in mind for a great outdoor adventure.
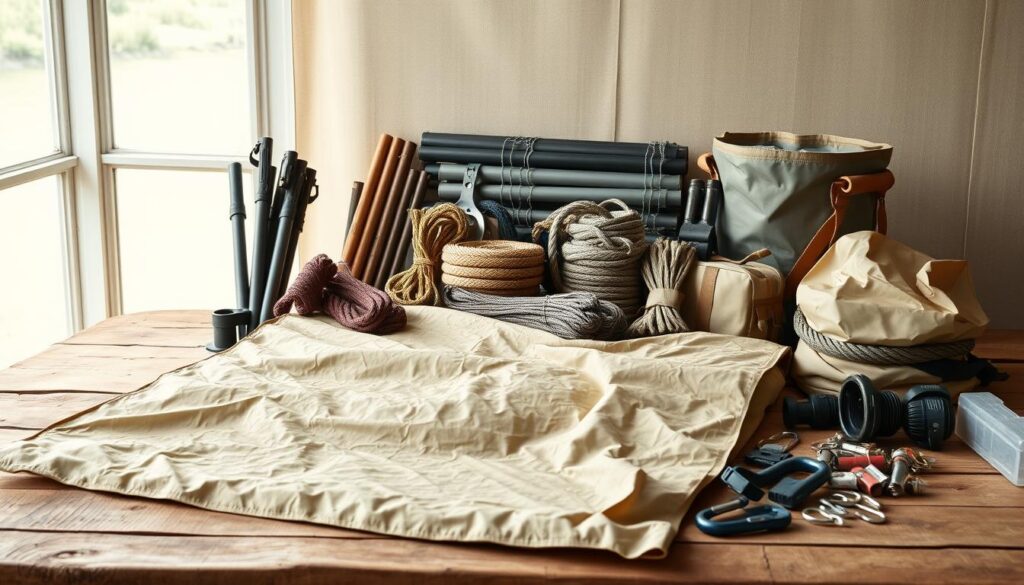
Choosing the Right Materials for My Tarp Shelter
The quality of a camping tarp shelter’s materials greatly affects its durability and function. When picking a tarp shelter, consider the fabric, accessories, and weight. This is important, as weight is a big factor for backpackers.
Selecting the Right Tarp Fabric
The tarp’s fabric is key. It decides how waterproof, durable, and effective the tarp is. Silnylon is a top choice for backpackers because it’s light and compact.
When picking a tarp fabric, look at the denier rating. It shows the fabric’s thickness and strength. A higher denier means a stronger fabric but might be heavier. For a camping tarp shelter, finding a balance between strength and weight is key.
Essential Accessories and Tools
Many accessories are needed for a good tarp shelter setup. These include stakes, guy lines, and paracord. Stakes can be made of aluminum or steel and affect how well they hold in different soils. Guy lines and paracord keep the tarp tight in all weather.
For a full tarp shelter setup, carrying basic tools like a knife or multi-tool is helpful. They can help adjust or fix the setup as needed.
Weight Considerations for Backpacking
For backpackers, the tarp shelter’s weight is very important. Lighter materials and designs make it easier to carry. The table below shows the weights of different tarp shelter materials and accessories.
| Component | Material | Weight (oz) |
|---|---|---|
| Tarp Fabric | Silnylon | 12 |
| Stakes | Aluminum | 6 |
| Guy Lines | Paracord | 3 |
| Total | 21 |
By choosing the right materials and accessories for a tarp shelter, outdoor lovers can have a reliable and portable shelter. It meets their needs for both strength and ease of carrying.
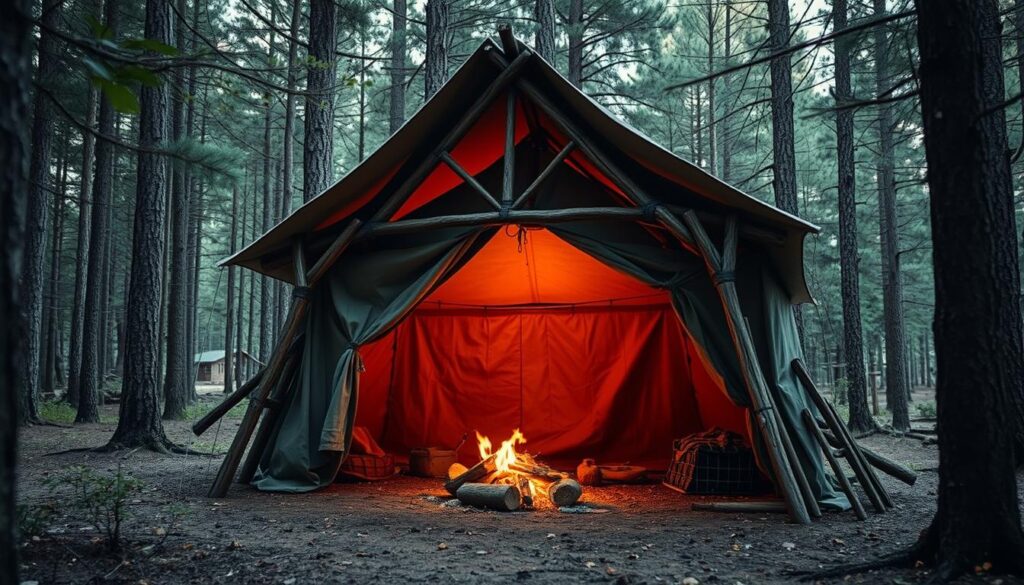
Planning the Design of My Tarp Shelter
Building an emergency tarp shelter starts with a good design. This phase is as important as the actual construction. It ensures your shelter meets your needs.
Ideal Shelter Shapes
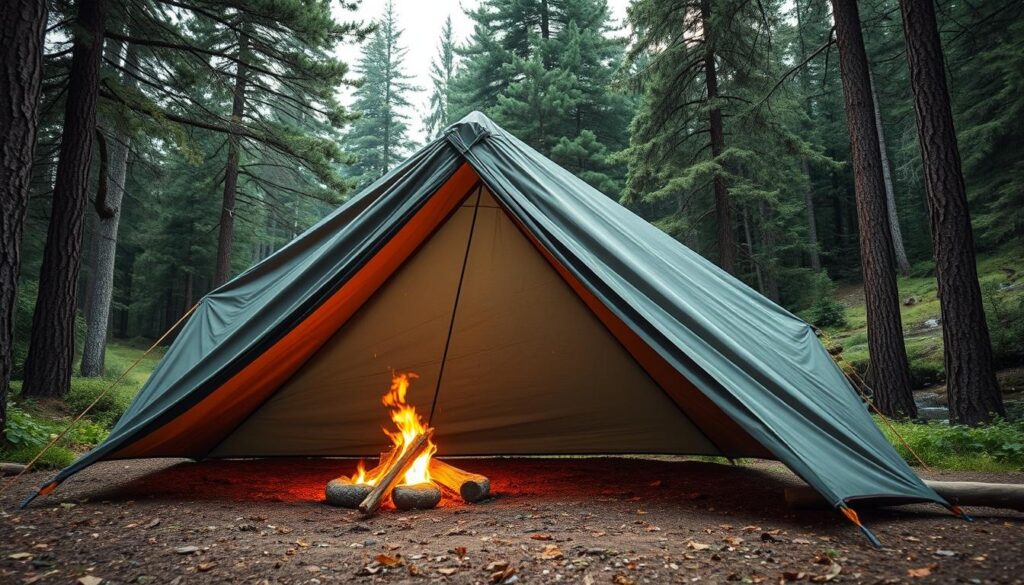
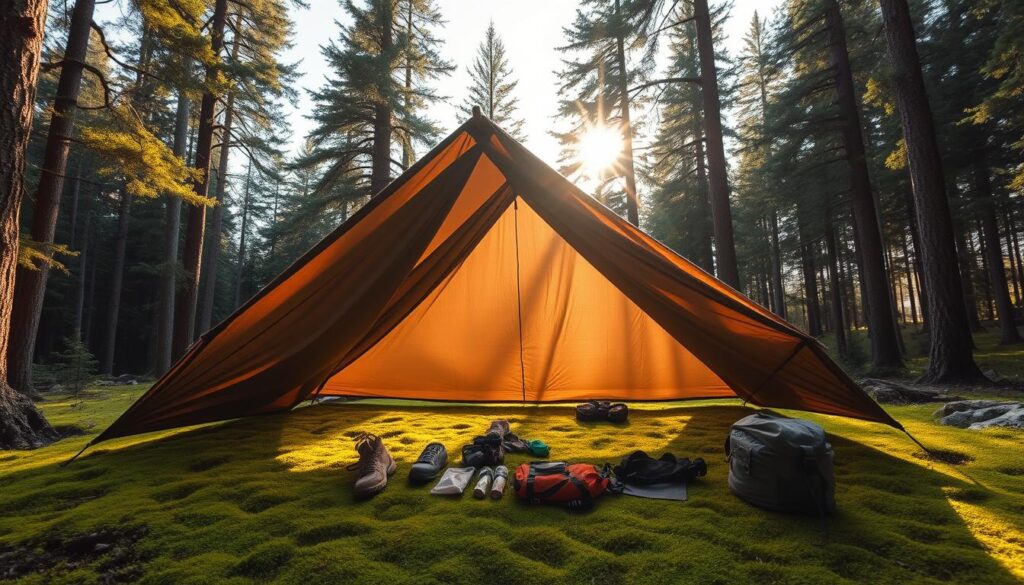
The shape of your tarp shelter is key for its stability and use. You can choose from A-frame and diamond shapes. Each has its own benefits based on weather and terrain.
- A-frame: Great for keeping out rain and wind.
- Diamond: Offers more room inside and fits different landscapes.
Picking the right shape is vital for a successful how to make a tarp shelter project.
The Role of Terrain in Design
The terrain greatly affects your tarp shelter’s design. For example, a sloping area might need a special setup. Knowing your terrain helps plan a shelter that’s safe and cozy.
- Look for natural shelters or obstacles in the land.
- Choose a design that fits the terrain well.
Aesthetic Considerations
Functionality is key, but your tarp shelter’s look matters too. A good design can make your shelter blend in, reducing its impact on nature.
By thinking about these points, you can make a tarp shelter that’s not just useful. It should also look good and meet your outdoor needs.
Setting Up My Tarp Shelter in the Field
Setting up my tarp shelter is a ritual I’ve mastered over the years. It’s a process that requires attention to detail, the right materials, and practice.
Choosing the Perfect Location
Finding the ideal spot for my tarp shelter is key. I look for a spot that’s flat, dry, and protected from harsh winds. Proximity to a water source is also important, but I avoid being too close to prevent flooding or attracting insects.
- Look for natural windbreaks like trees or rock formations.
- Avoid low-lying areas that could collect water.
- Consider the direction of the sun and possible shade.
Step-by-Step Setup Guide
Once I’ve picked my spot, it’s time to set up the tarp shelter. Here’s a step-by-step guide I’ve developed over time:
- Unpack and prepare the tarp: Lay out the tarp and check for any damage.
- Identify anchor points: Find trees, rocks, or other sturdy objects to secure the tarp to.
- Secure the tarp: Use stakes and paracord to tie down the tarp, ensuring it’s tight and evenly spread.
- Adjust for wind and rain: Make any necessary adjustments to the tarp’s angle and tension to prepare for weather.
Tips for Securing Your Tarp
Securing the tarp properly is vital for a stable shelter. I use stakes and paracord to tie down the tarp, making sure they’re driven into the ground at an angle. Regularly checking the tension and making adjustments as needed helps prevent sagging or flapping in the wind.
- Use rocks or logs to weigh down the edges if stakes can’t be used.
- Consider using guy lines for additional stability.
- Keep the tarp taut to prevent water from collecting on it.
Weather Considerations for Tarp Shelters
As I learned more about tarp shelters, I found that adapting to weather is key. Weather can greatly affect how well a tarp shelter works. It’s important to know how to get ready for different weather conditions.
Preparing for Rain and Wind
Rain and wind are tough for tarp shelters. To handle these, choose a waterproof tarp with strong stitching. The tarp’s angle and how tight it is also matter. A steeper angle helps rain slide off, and tightness stops it from flapping.
Key Features for Rain and Wind Resistance:
- Waterproof and breathable fabric
- Reinforced stitching and stress points
- Adjustable and secure guy lines
Insulating for Cold Weather
Cold weather is another challenge for tarp shelters. Keeping warm inside is key. Using a sleeping pad and a warm bag helps a lot. Also, picking a spot that blocks cold winds is smart.
| Insulation Method | Description | Effectiveness |
|---|---|---|
| Sleeping Pad | Provides a barrier between the ground and the sleeper | High |
| Warm Sleeping Bag | Traps body heat to keep warm | High |
| Natural Windbreaks | Utilizes natural barriers to block cold winds | Medium |
Sun Protection Strategies
Sun protection is just as important as rain and wind. Sunlight can cause heat stress and discomfort. Using a UV-protected tarp or a UV coating helps. Also, setting up the tarp to block sun during peak hours makes it more comfortable.
Tips for Sun Protection:
- Use a UV-resistant tarp or apply a UV coating
- Position the tarp to maximize shade
- Stay hydrated to avoid heat stress
Maintenance and Care for My Tarp Shelter
Keeping my tarp shelter in top shape is more than just fixing it when it breaks. It’s about regular care to keep it a trusted friend on my outdoor adventures.
Through many camping trips, I’ve learned that a well-cared-for DIY tarp shelter can handle tough weather and last for years. The secret is to clean it often, fix it quickly, and store it right.
Cleaning My Tarp After Use
It’s important to clean my tarp after every use. First, I remove any twigs or leaves that might be on it. Then, I use a mild soap and water to clean off dirt and stains. It’s key to rinse it well to avoid soap residue that could attract dirt or harm the waterproof coating.

Repairing Minor Damage
Small tears or holes can be fixed with a tarp repair kit or some DIY tricks. I always carry a small repair kit with me, which has patches and glue. For bigger damages, I use strong patching materials that can stand up to the weather.
Storing My Tarp for Longevity
Storing my camping tarp shelter right is key to making it last longer. Before storing, I make sure it’s dry to avoid mold or mildew. Then, I fold or roll it neatly and keep it in a cool, dry spot, away from sunlight. Using a storage bag or container helps keep it dust-free and safe from damage.
By sticking to these care and maintenance tips, my tarp shelter stays in great shape. It keeps providing me with a reliable shelter for all my future camping trips.
Real-Life Experiences with My Tarp Shelter
I’ve learned a lot from using a tarp shelter setup on many adventures. It’s simple yet very effective. My experiences have shown me how durable and versatile it is. They’ve also taught me about being resilient outdoors.
Success Stories from the Trail
One time, I was on a solo hike in the mountains when a storm hit. My emergency tarp shelter saved me. It kept me safe from rain and wind.
On another trip, we set up multiple tarp shelters for a group camp. It was quick and kept us dry. It made the trip unforgettable.
| Scenario | Tarp Shelter Benefits | Lessons Learned |
|---|---|---|
| Solo Hike | Protection from elements, ease of setup | Importance of choosing the right location |
| Group Camping | Communal shelter, versatility in design | Value of planning and teamwork |
Lessons Learned from Mistakes
I’ve had my share of challenges with my tarp shelter. Once, I didn’t secure it well and it got damaged by wind. This taught me the importance of a solid tarp shelter setup and regular care.
For tips on better tarp shelter designs, check out this resource on shelter experiments.
Enhancements I Made Along the Way
I’ve made my tarp shelter better over time. I added strong stitching and a bug net for comfort. These changes have made it more useful and enjoyable.
I’ve also tried different ways to use my tarp. Like using it as a windbreak or sunshade. This has made it even more versatile for outdoor activities.
Customizing My Tarp Shelter Experience
Using my tarp shelter more, I wanted to make it my own. Customizing it has improved its use and enjoyment. Here, I’ll share how I’ve made my tarp shelter fit my outdoor needs.
Adding Personal Touches
I’ve added comforts like a lightweight rug and cozy bedding. These make my shelter feel welcoming. Personalization can be simple, like adding a favorite color or symbol.
I’ve put personalized tags on my tarp to give it a unique feel. These small changes have greatly improved my camping.
Incorporating Additional Gear
I’ve added essential items like a portable stove and water filter. These additions have made camping more comfortable and convenient.
As
“The right gear can make all the difference in your outdoor adventures.”
I focus on choosing lightweight, functional gear. This keeps my tarp shelter easy to set up and take down.
Upcycling Old Materials
Upcycling old materials has been creative and eco-friendly. I’ve made a windscreen from fabric scraps and used old rope for guy lines.
By upcycling, I’ve given old materials new life. It’s a great way to add personality to your tarp shelter.
Customizing my tarp shelter has made it functional and personal. Whether you’re new to camping or experienced, try different ideas to make your tarp shelter unique.
Exploring Tarp Shelter Alternatives
Outdoor adventures show that the right shelter is key. Tarps are my favorite, but it’s good to look at other options too. This helps find the best shelter for each situation.
Comparing Tarps to Traditional Tents
Choosing between tarps and tents involves many factors. Tents keep you dry and warm better but are heavier and harder to set up.
| Feature | Tarp Shelter | Traditional Tent |
|---|---|---|
| Weight | Generally lighter | Can be heavier due to additional structure |
| Setup Complexity | Can be simpler, depending on design | Often more complex due to poles and stakes |
| Protection from Elements | Offers good protection but can be more exposed | Provides excellent protection from wind, rain, and sun |
Hammocks with Tarps: A Different Perspective
Hammocks with tarps are a great alternative. They are light and comfy. They work best in wooded areas where you can hang the hammock.
- Advantages: Lightweight, comfortable, and can be set up quickly in suitable environments.
- Disadvantages: Limited to areas with suitable trees, and may not provide the same level of protection as a traditional tent or tarp shelter.
When to Use a Tarp Instead of a Shelter
Deciding between a tarp and other options depends on your adventure. Tarps are best when you need something light and easy to set up.
In open areas with little wind and rain, tarps are great. But in bad weather or when you need more protection, tents or other shelters might be better.
Knowing the good and bad of each shelter helps outdoor lovers make better choices. This improves their adventure experience.
Essential Tips for Using a Tarp Shelter
Using a tarp shelter well needs some knowledge and practice. To enjoy the outdoors fully, it’s key to know how to use a tarp shelter.
Frequently Asked Questions
Many outdoor lovers have questions about tarp shelters. Here are some answers to frequently asked questions.
- What is the best way to set up a tarp shelter? The key is to choose a suitable location and use the right techniques to secure it.
- How do I protect my tarp shelter from wind and rain? Using guy lines and stakes effectively can make a big difference.
For more detailed guides on setting up a tarp shelter, you can refer to resources like my guide to crafting a reliable survival, which provides detailed instructions.
Common Pitfalls to Avoid
When using a tarp shelter, there are several common pitfalls to watch out for.
- Not choosing the right location, which can lead to water accumulation or exposure to harsh winds.
- Failing to secure the tarp properly, making it vulnerable to weather conditions.
Knowing these common issues can help you avoid them and have a better outdoor experience.
Resources for Further Learning
If you’re looking to learn more about tarp shelter ideas and DIY tarp shelter projects, there are many resources available.
- Online forums and outdoor enthusiast communities are great places to start.
- Books and guides on wilderness survival and outdoor skills can provide valuable insights.
Conclusion: Embracing the Tarp Shelter Lifestyle
Reflecting on my tarp shelter journey, I see the freedom and strength of the outdoors. A good tarp shelter has changed my outdoor adventures. It’s reliable and works well in different weather.
Learning about tarp shelters has been key. From picking the right materials to setting it up, every step is a lesson. I love how simple and effective tarp shelters are. I’m eager to share this with others.
Persisting in the Outdoor Lifestyle
I urge others to try a tarp shelter and see its benefits. With the right gear and attitude, we can face tough outdoor challenges. A tarp shelter is great for anyone, whether you’re experienced or new to camping.
Building Outdoor Resilience
When we go into the wilderness, we must be ready for anything. Setting up a tarp shelter is just the start. Embracing the tarp shelter lifestyle helps us gain skills and confidence for any outdoor adventure.
FAQ
What is the best material for a tarp shelter?
The top choice for a tarp shelter is a waterproof and tough fabric. Look for nylon or polyester with a silicone coating for extra protection.
How do I secure my tarp shelter in windy conditions?
For windy weather, use strong stakes and tie-downs. Adding rocks or trees as anchors can also help keep it steady.
Can I use a tarp shelter in cold weather?
Yes, tarp shelters work in cold weather too. Just make sure to insulate it well with bedding and clothes. Choose a tarp that’s both waterproof and breathable to avoid moisture buildup.
How do I clean and maintain my tarp shelter?
Clean your tarp with mild soap and water. Let it dry completely before storing. Fix any tears or damage right away.
What are some common tarp shelter designs?
You’ll find lean-to, A-frame, and diamond shape designs. Each has its own benefits and suits different terrains and weather.
Can I customize my tarp shelter with additional gear?
Absolutely, you can add bug nets, windbreaks, and storage pockets. This makes your tarp shelter more functional and cozy.
How does a tarp shelter compare to a traditional tent?
Tarp shelters are lighter and more flexible than tents. But they might not protect as well from the elements. Your choice depends on your camping style and needs.
What are some tips for setting up a tarp shelter?
Pick a flat, dry spot for your tarp. Use solid stakes and tie-downs. Think about the wind and rain direction for a sturdy, weather-tight shelter.
Can I use a tarp shelter in rainy conditions?
Yes, tarp shelters work in rain. Make sure it’s well-attached, made of waterproof material, and pitched to let water run off.
How do I store my tarp shelter when not in use?
Clean and dry your tarp first. Then, store it loosely in a dry bag or container. This helps prevent damage and keeps it lasting longer.